 Call us
 Email us
 Request a meeting
 Live chat
Support for your Dyson Micro 1.5kg™ vacuum
Dyson Micro 1.5kg

Here you can find helpful tips, maintenance advice, your user manual, video guides, FAQs and more.
Register your machine
Receive support that's tailored to you, owner exclusives and more when you register your vacuum.
Getting started
It's easy to get started with your new 1.5kg cordless vacuum. You can watch our video for a quick introduction.
Dyson Micro 1.5kg™ vacuum user manual
Download your Dyson Micro 1.5kg™ vacuum user manual.
10.2MB
Charging your battery
The first battery charge can take up to four hours. For more information on battery charging, watch our video.
Getting to know your power modes
-
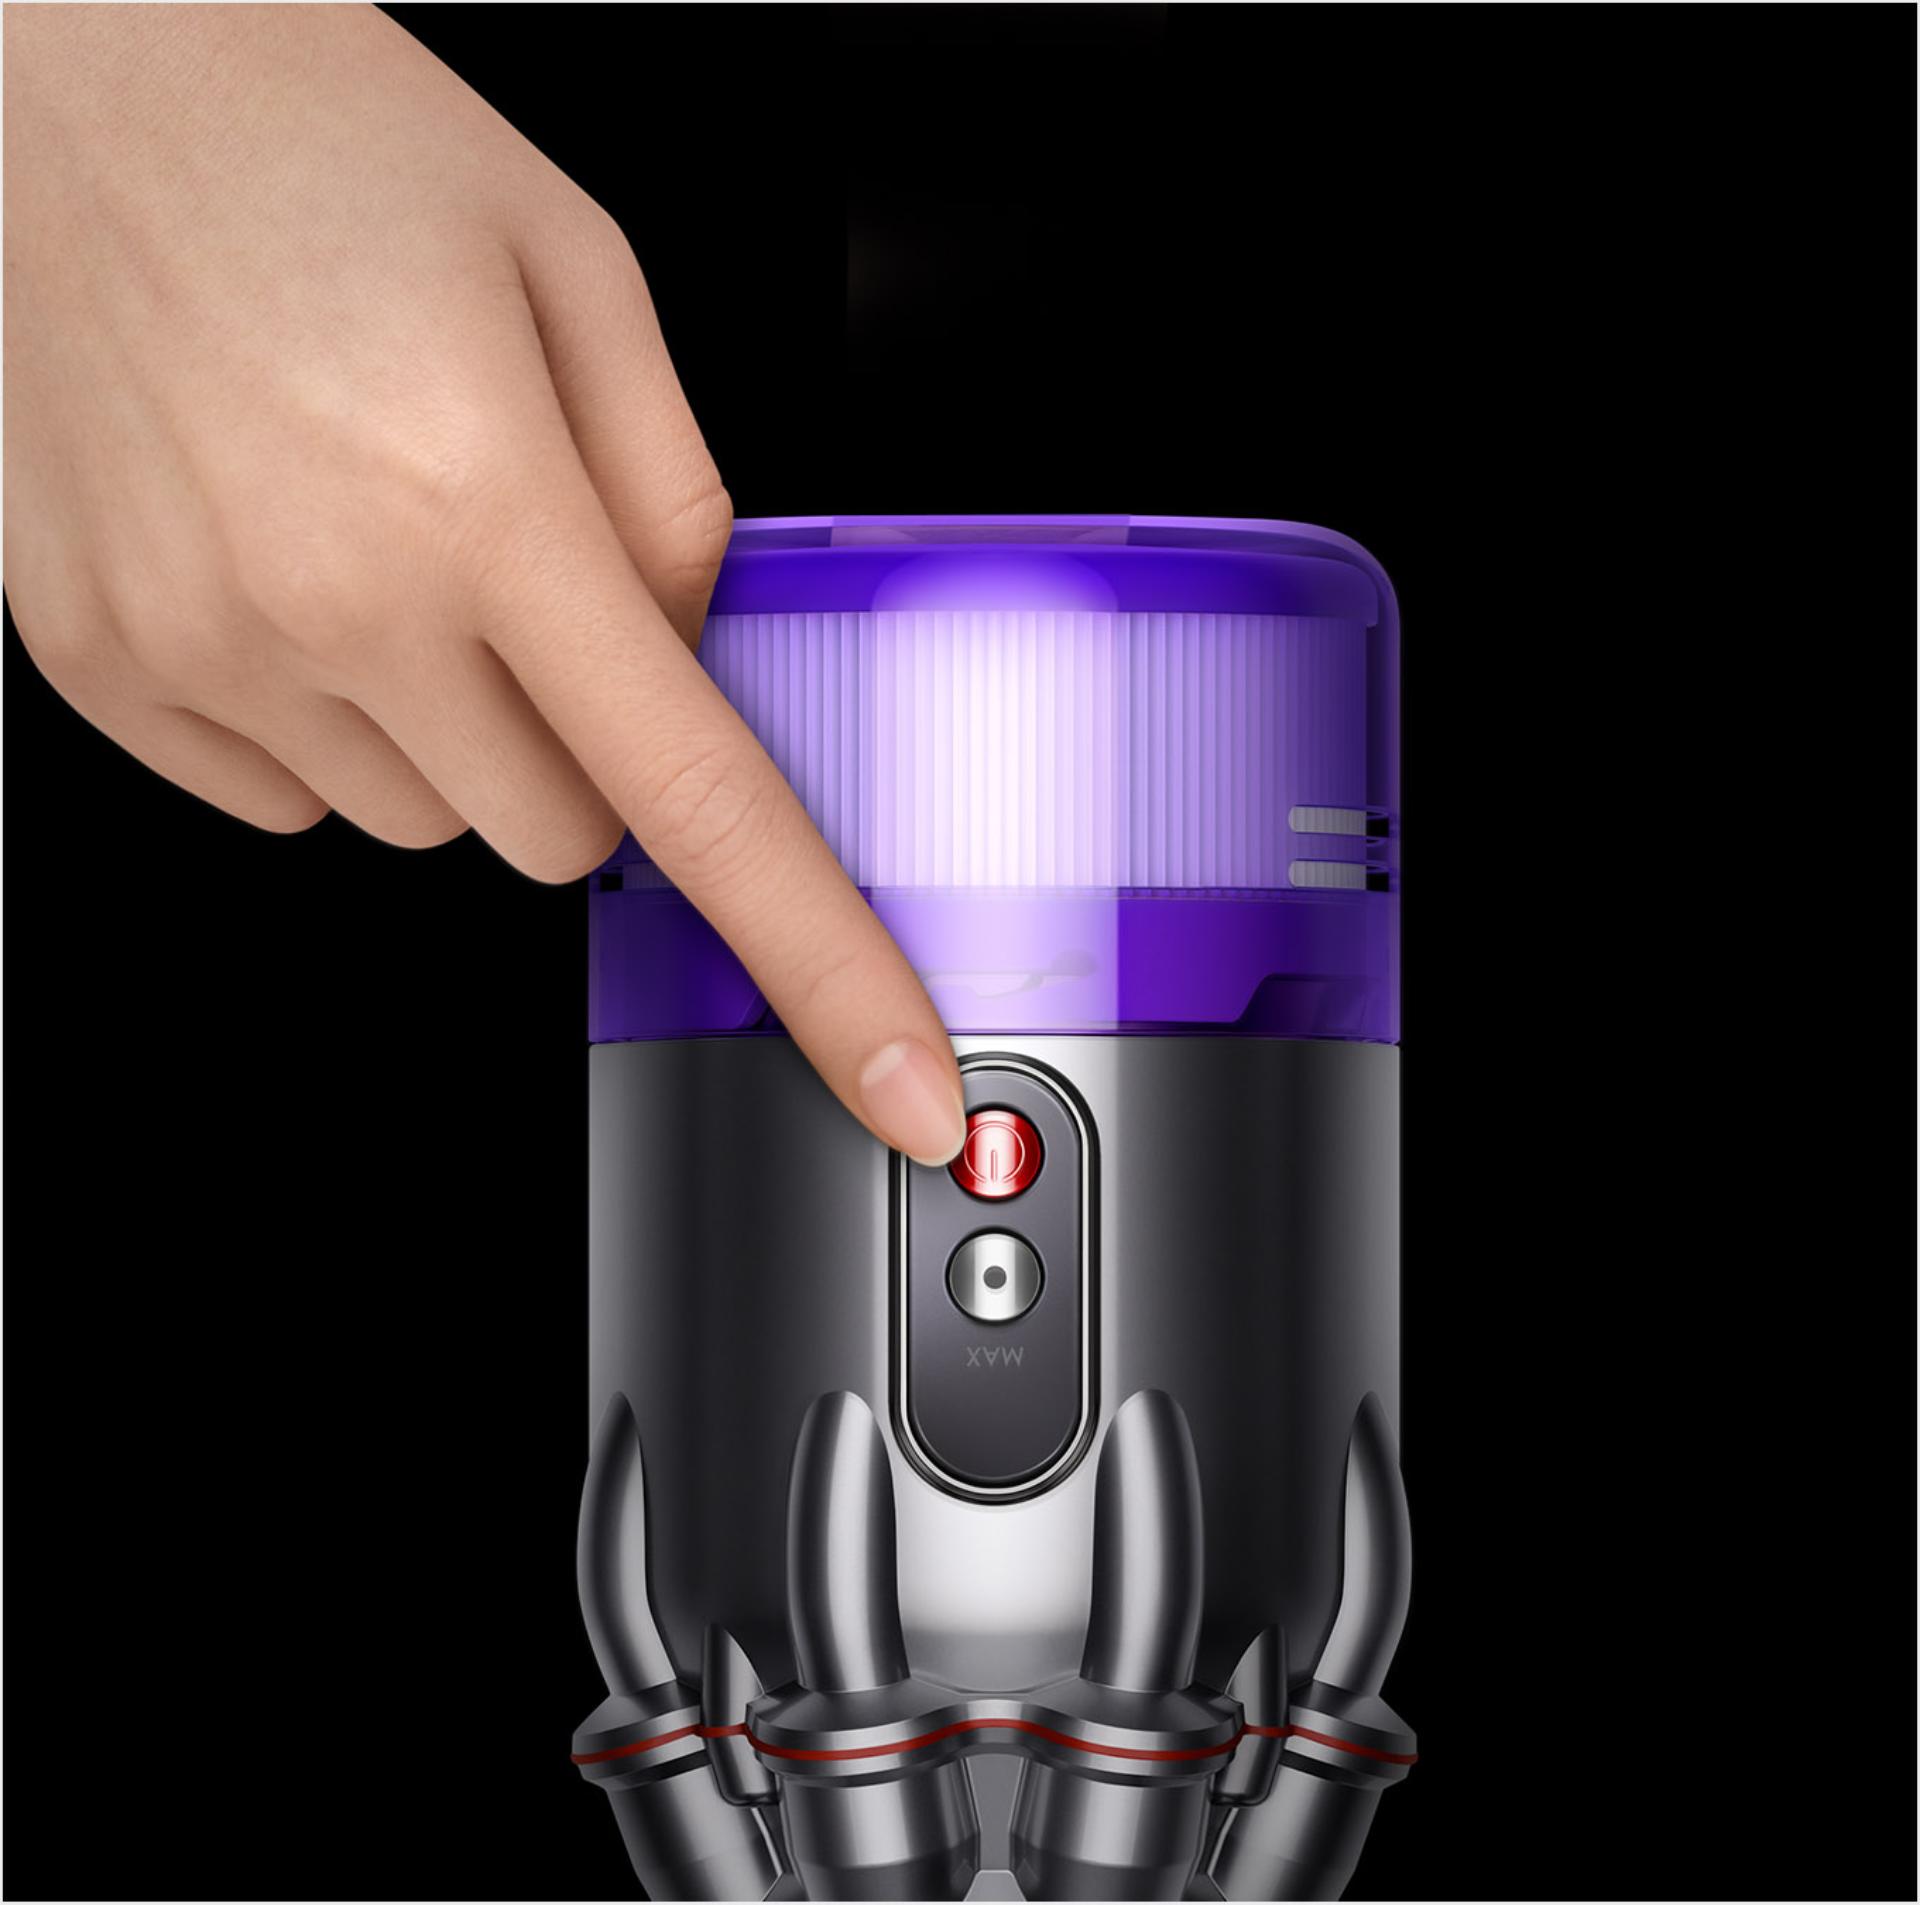
Eco mode
Designed for everyday floor cleaning, Eco mode is engineered to deliver the optimum balance of power and run time. Press the Power button to turn the vacuum on and activate Eco mode.
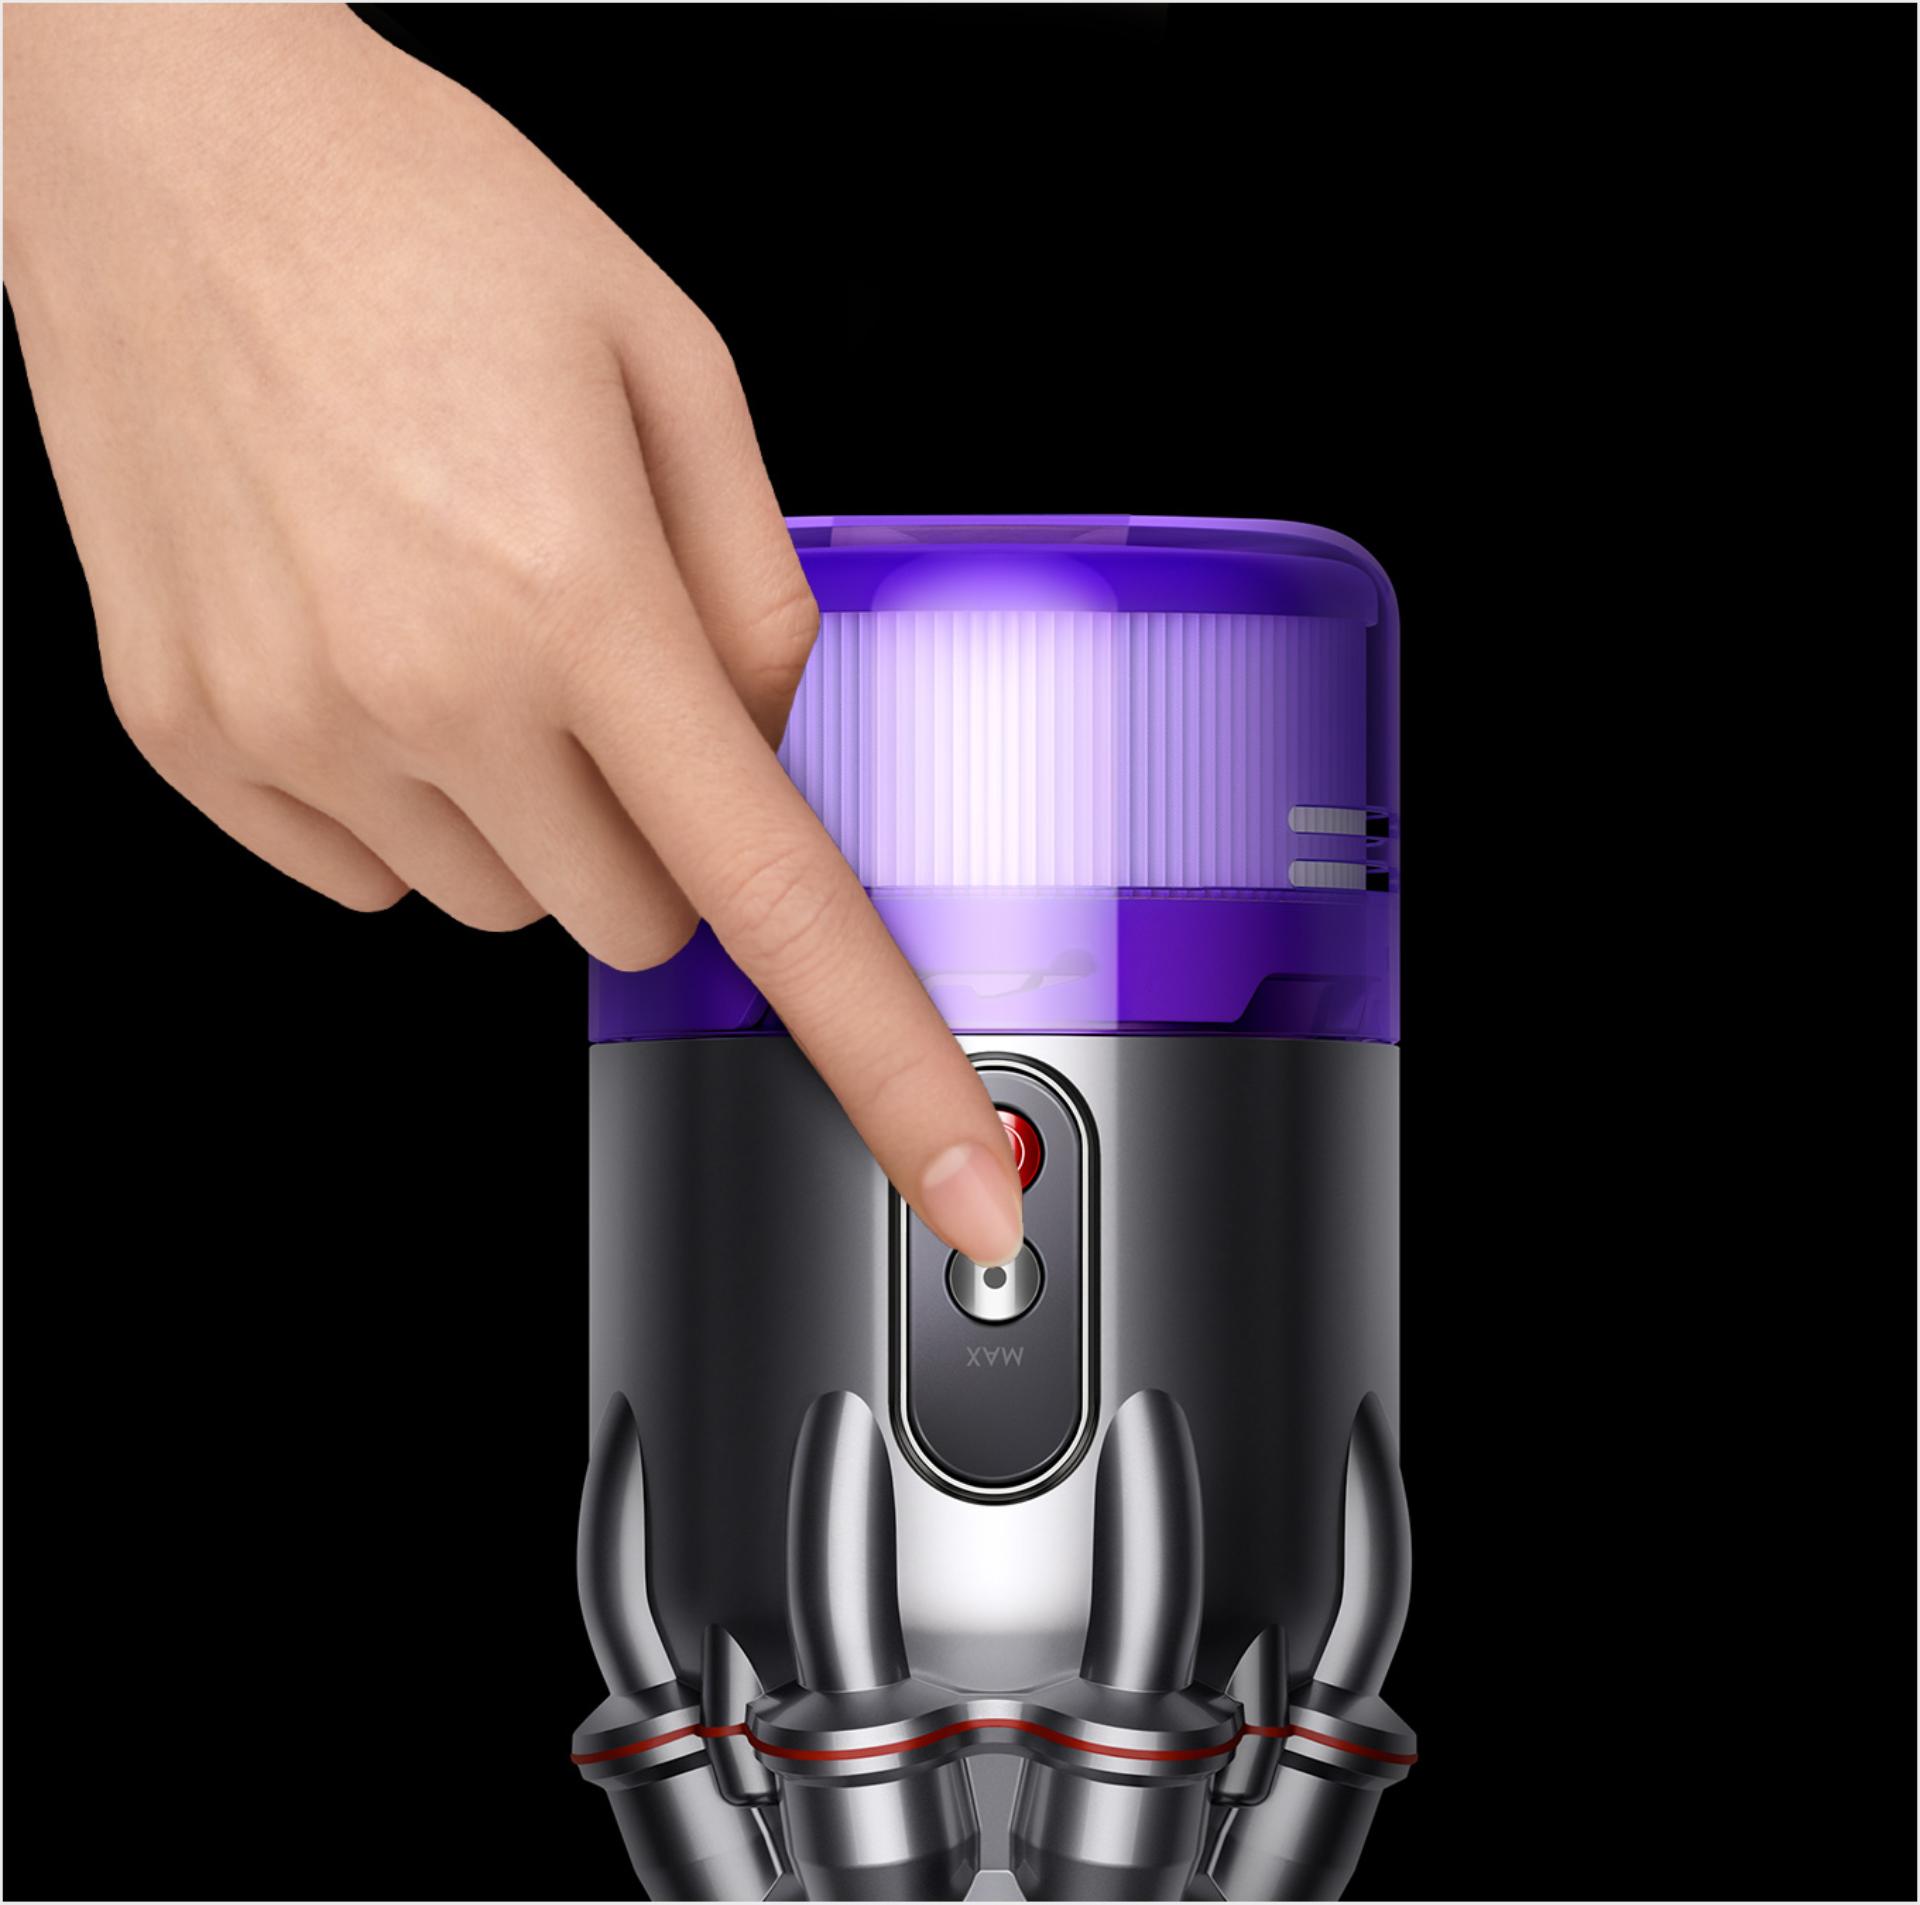
MAX mode
Maximum power, with a shorter run time. For intensive spot cleaning of ground-in dirt. Press the Mode Change button when the machine is working to switch MAX mode on and off.


Cleans anywhere
Your Dyson-engineered accessories are ergonomically designed for cleaning up high, down low and everywhere in between – including futons, blinds, stairs and cars.
-
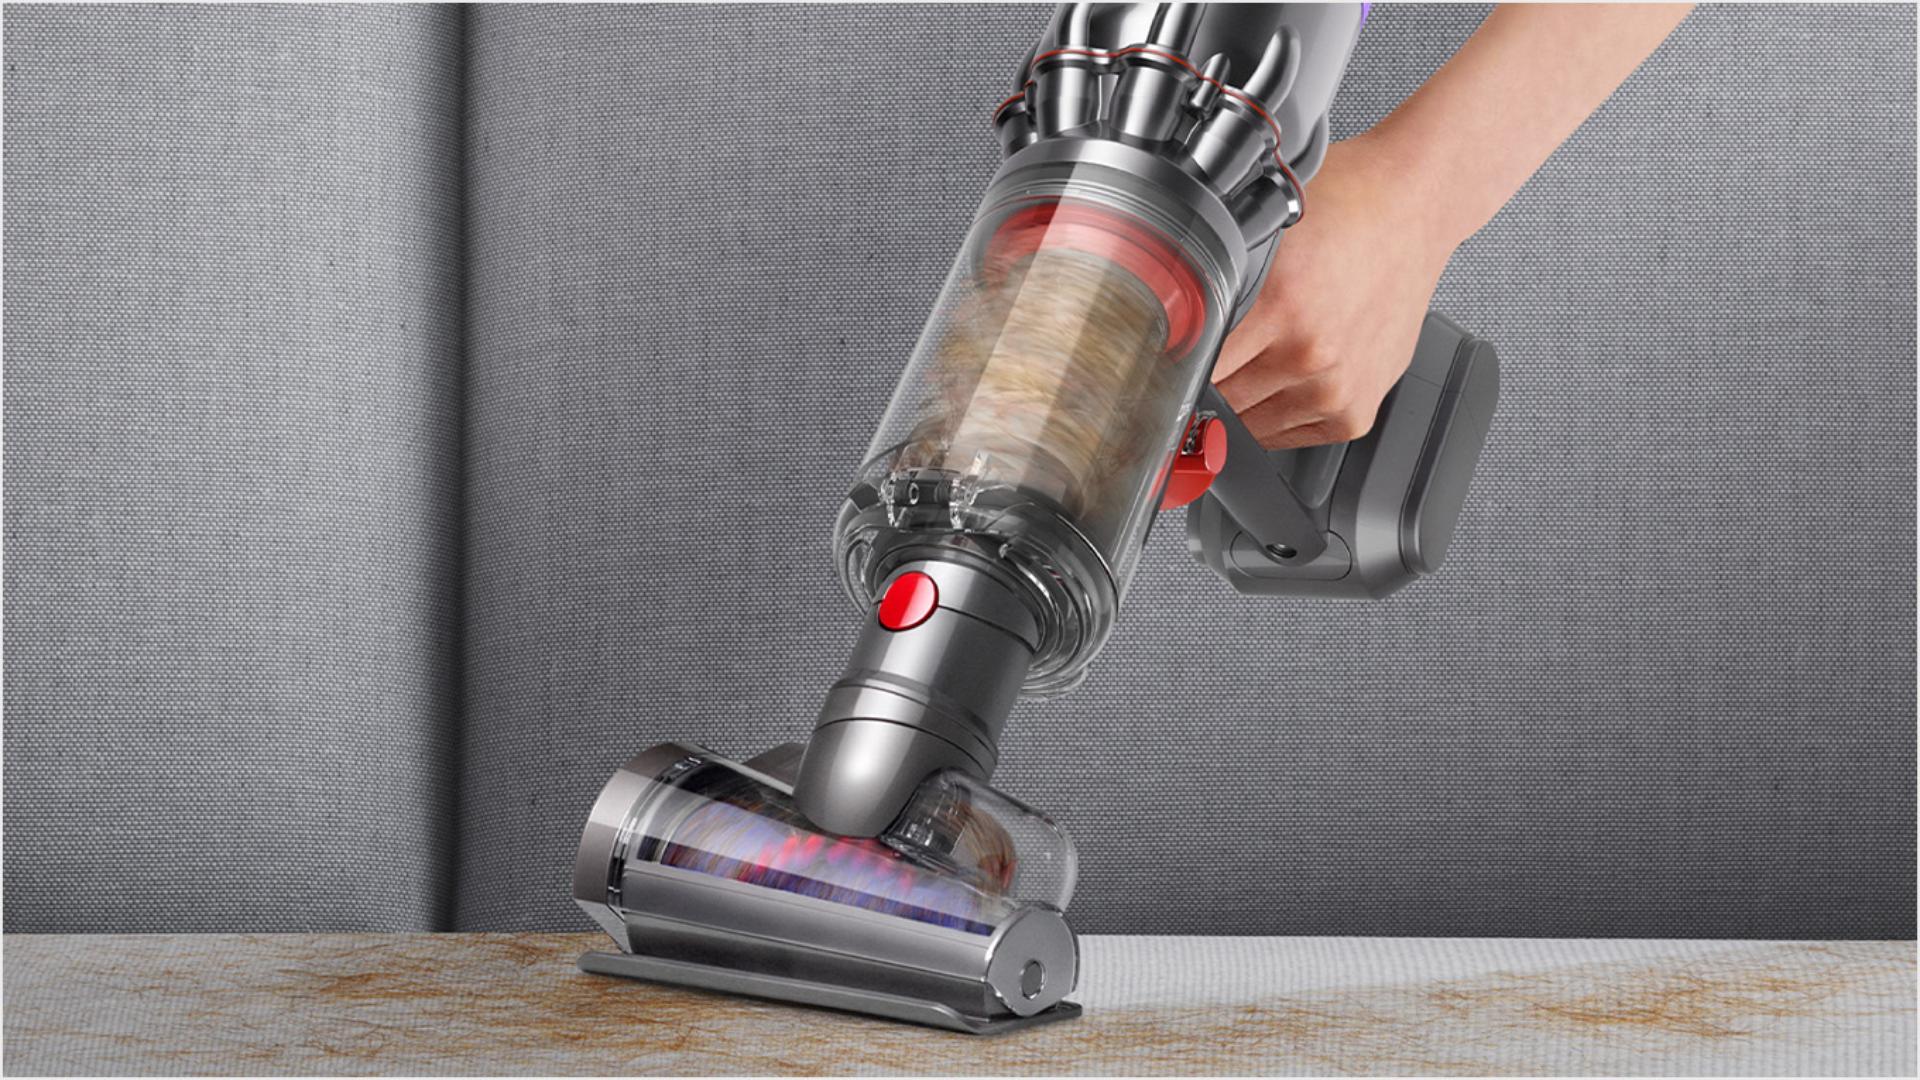
Hair screw tool
Picks up hair, fast. Anti-tangle conical brush bar spirals hair straight into the bin.
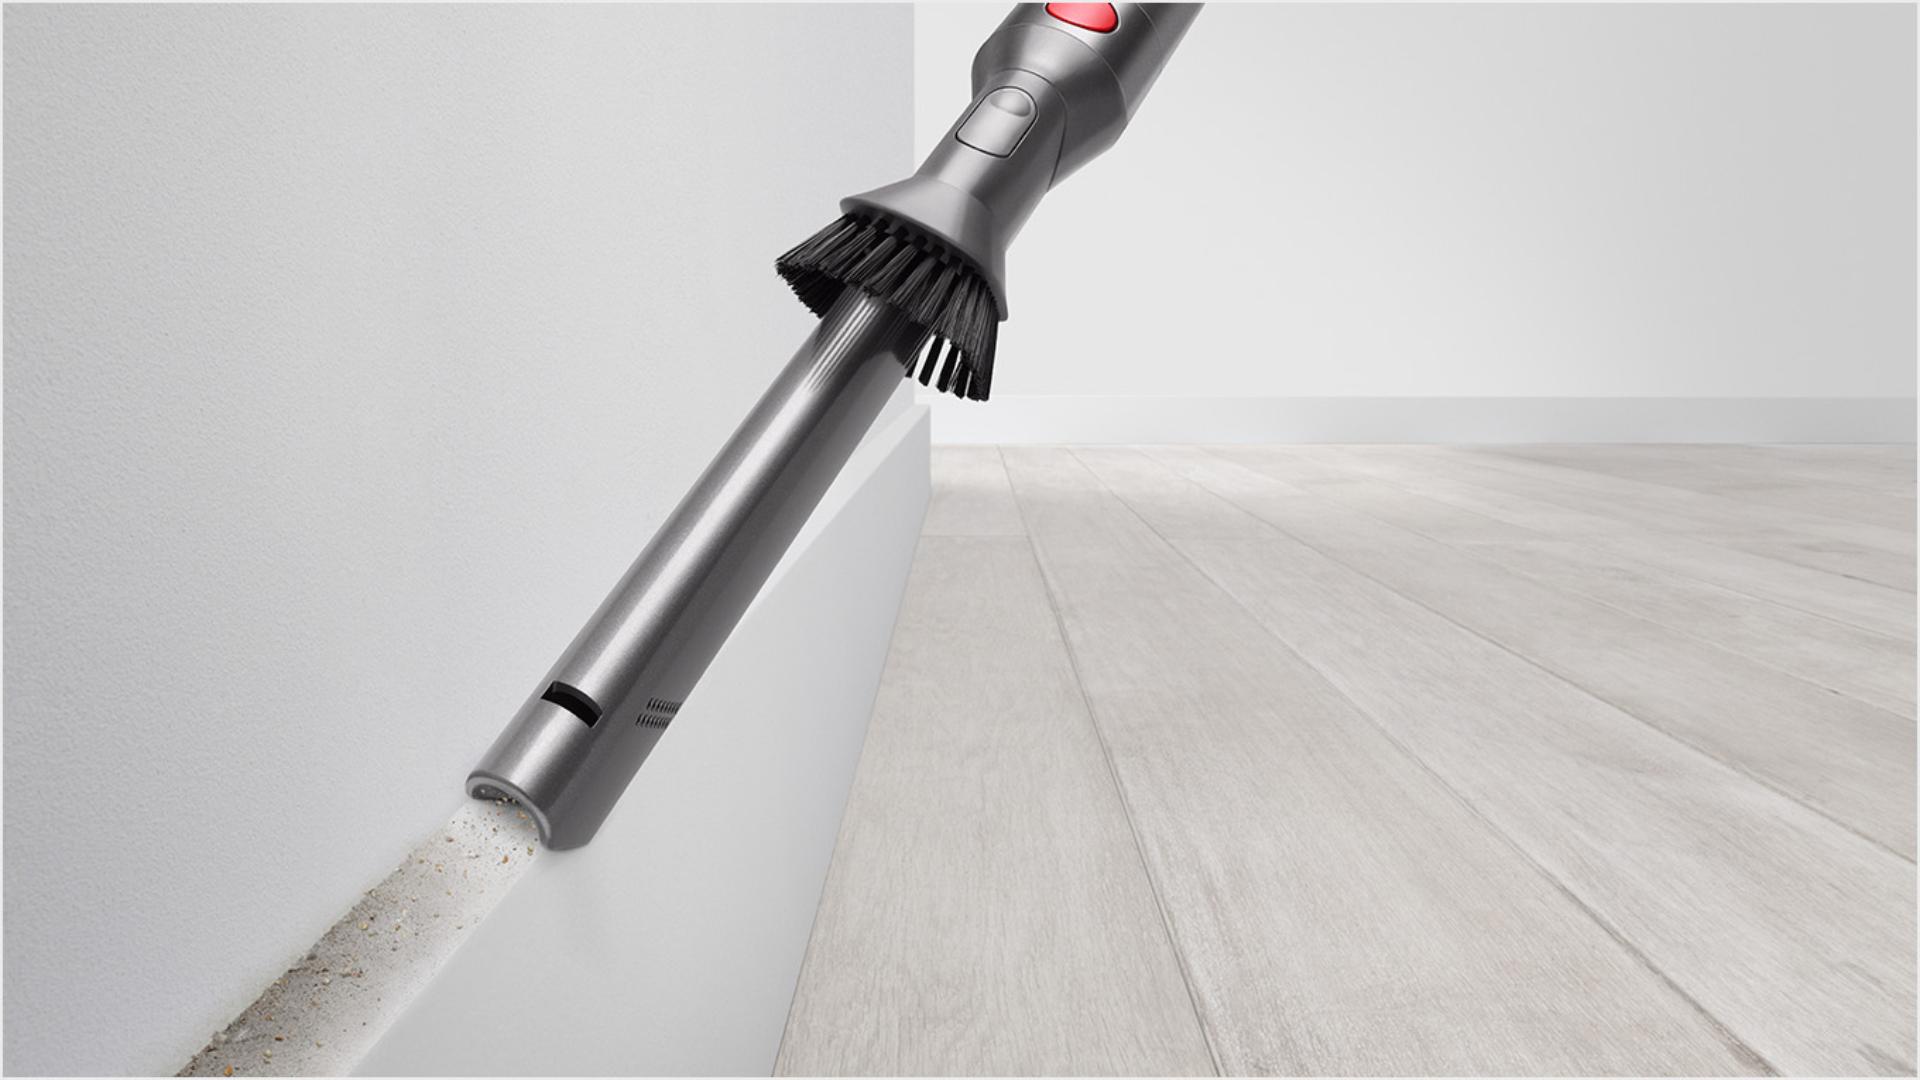
Combi-crevice tool
Two tools in one – nozzle and brush, for precise cleaning in hard-to-reach narrow spaces.
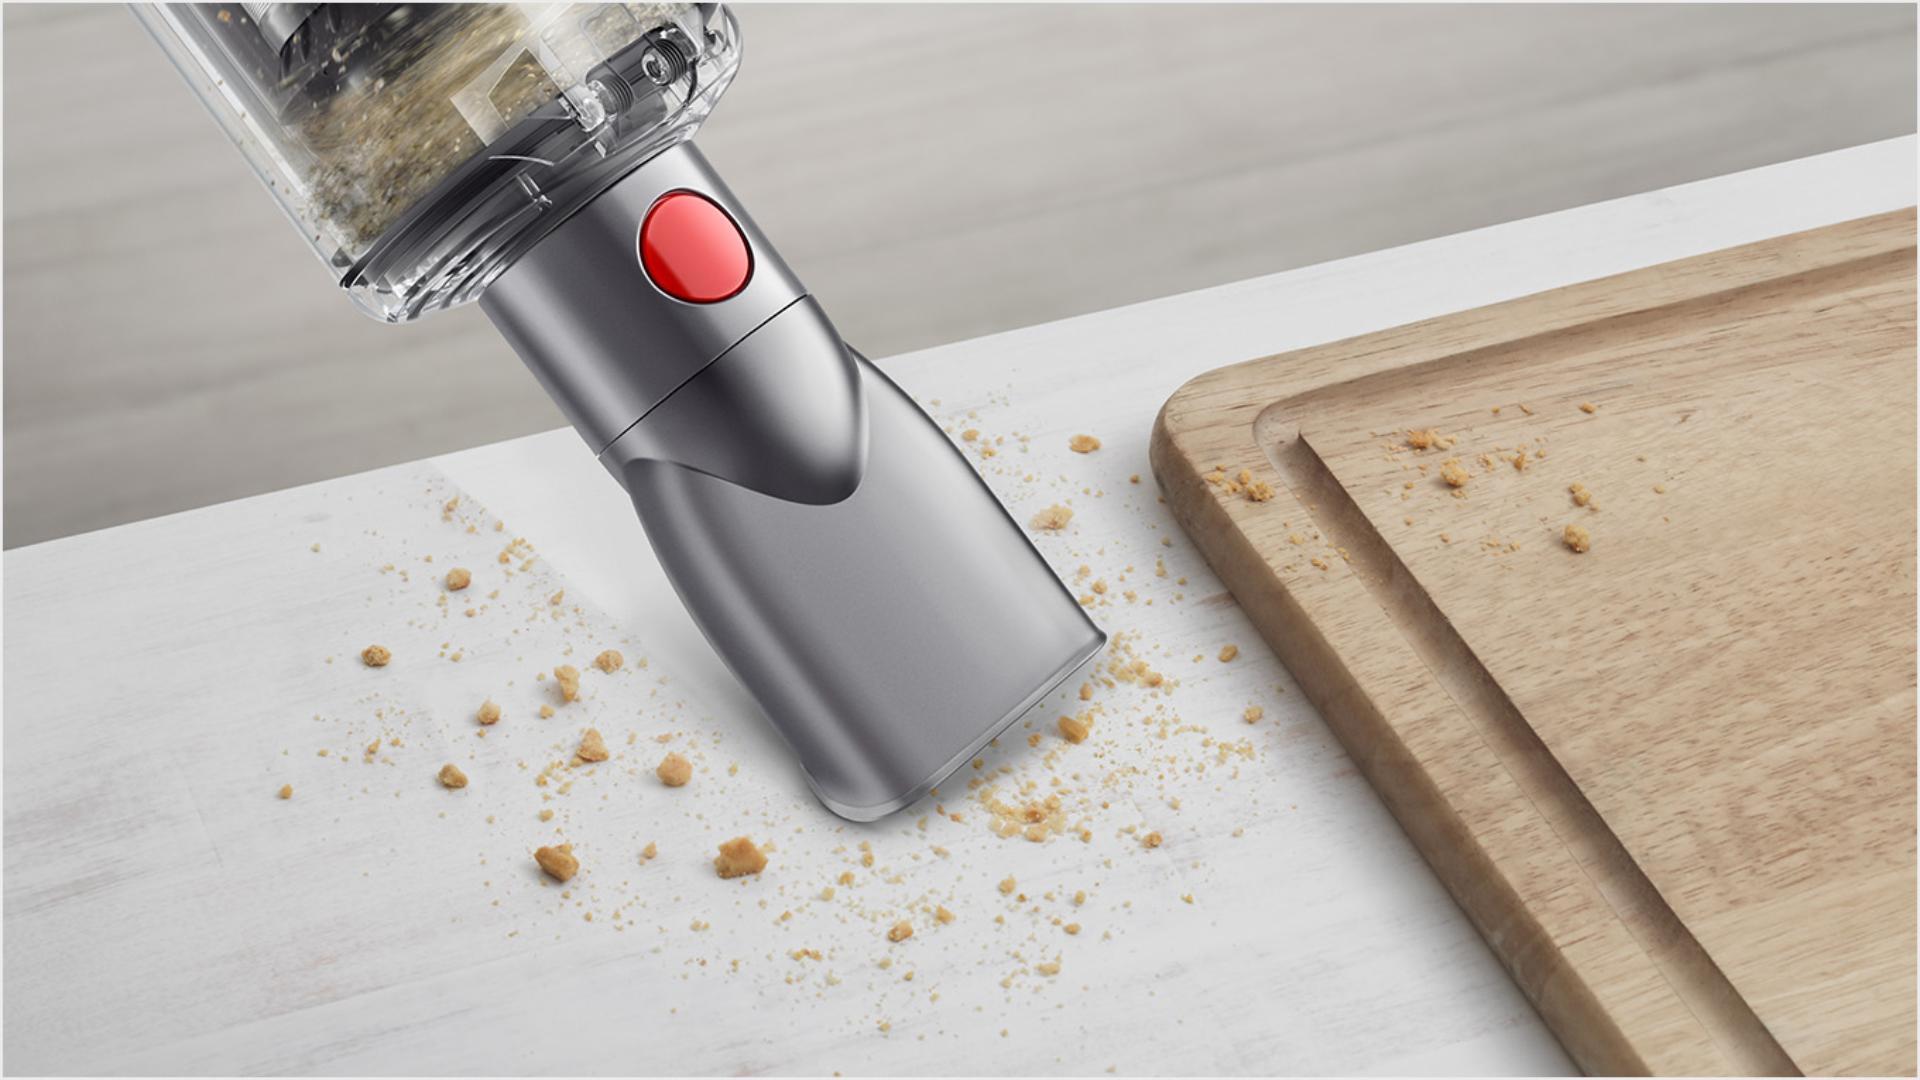
Worktop tool
Engineered for cleaning kitchen worktops, tables and hard surfaces.
Fitting the wall dock
If you haven't already installed your wall dock, our video shows you how. There's also a step-by-step guide included in the box.
Maintaining your machine
It's important to maintain your machine to keep it working at its best. From washing the filter to emptying the bin, you can find tips and advice below.
-
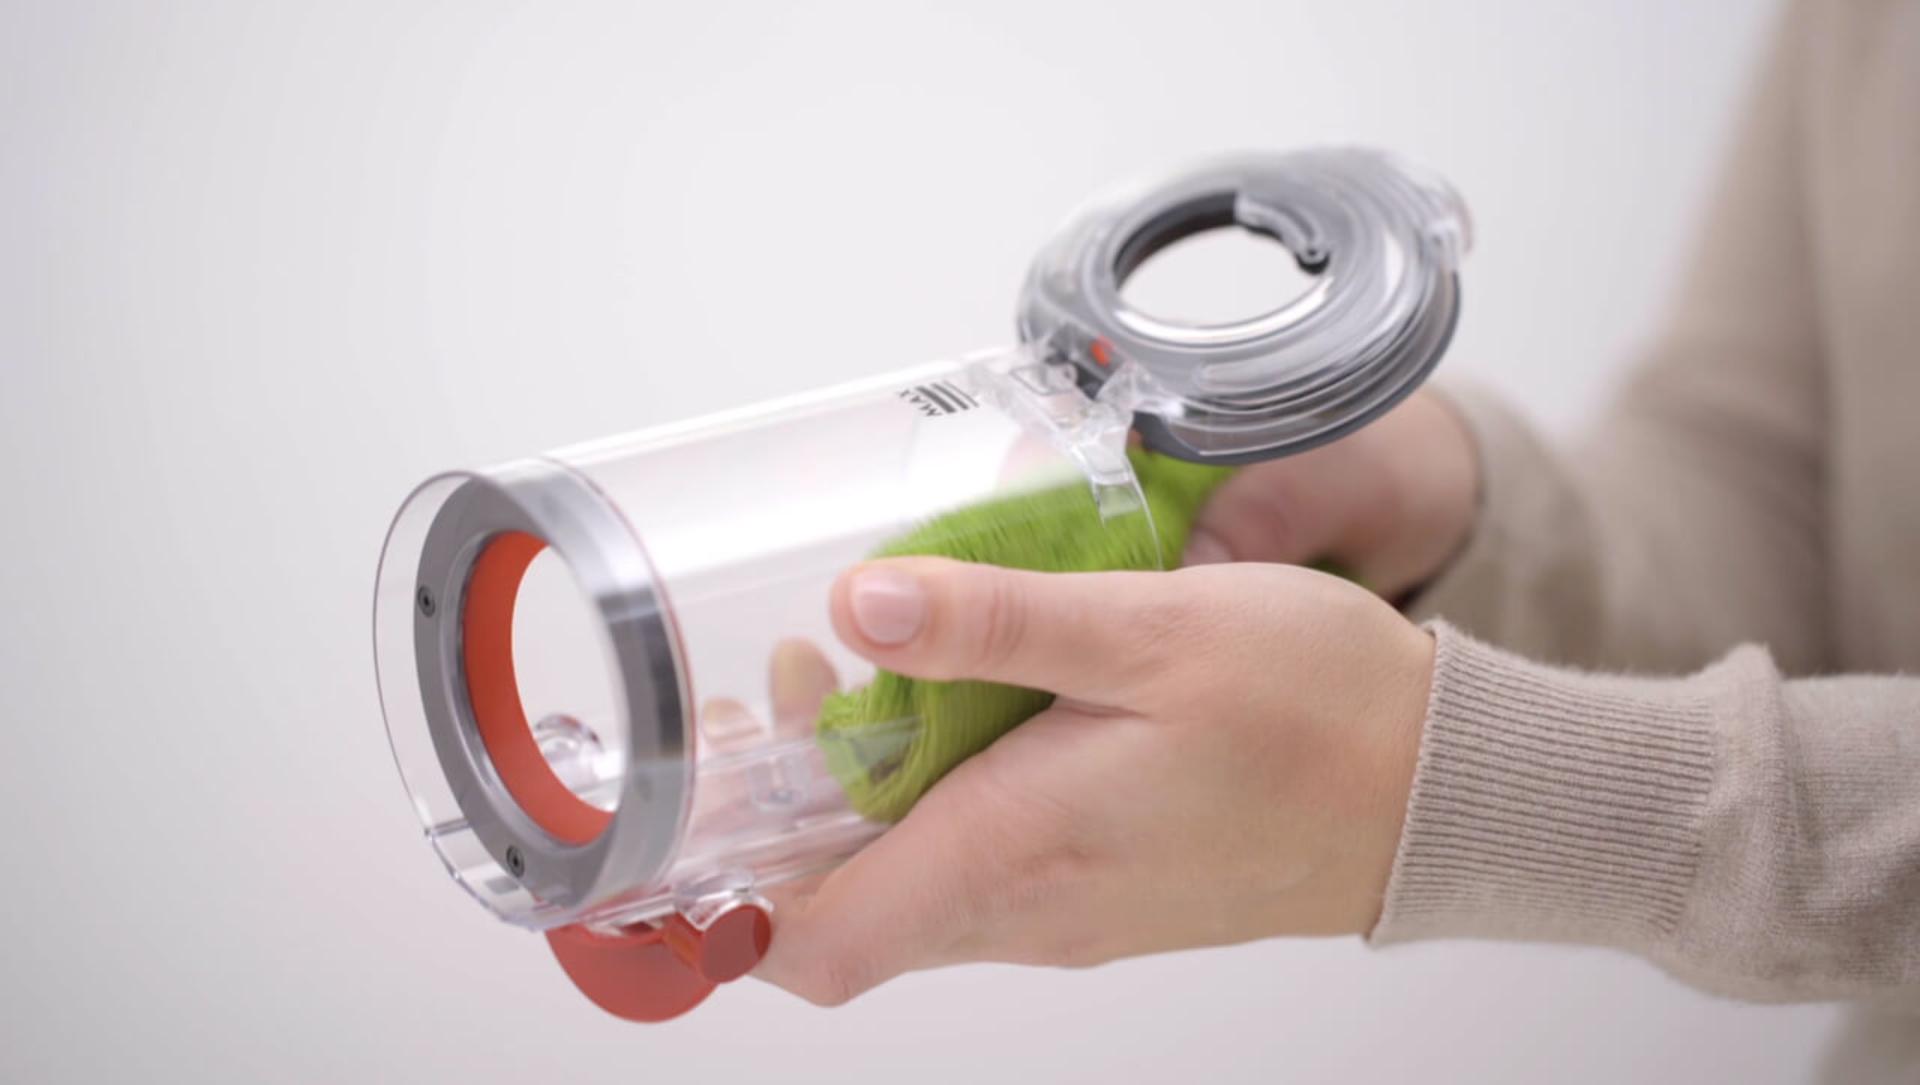
Cleaning the bin
You can maintain suction by emptying the bin before debris reaches the MAX line. The bin can also be fully removed from the machine for cleaning. Watch our video for a step-by-step guide.
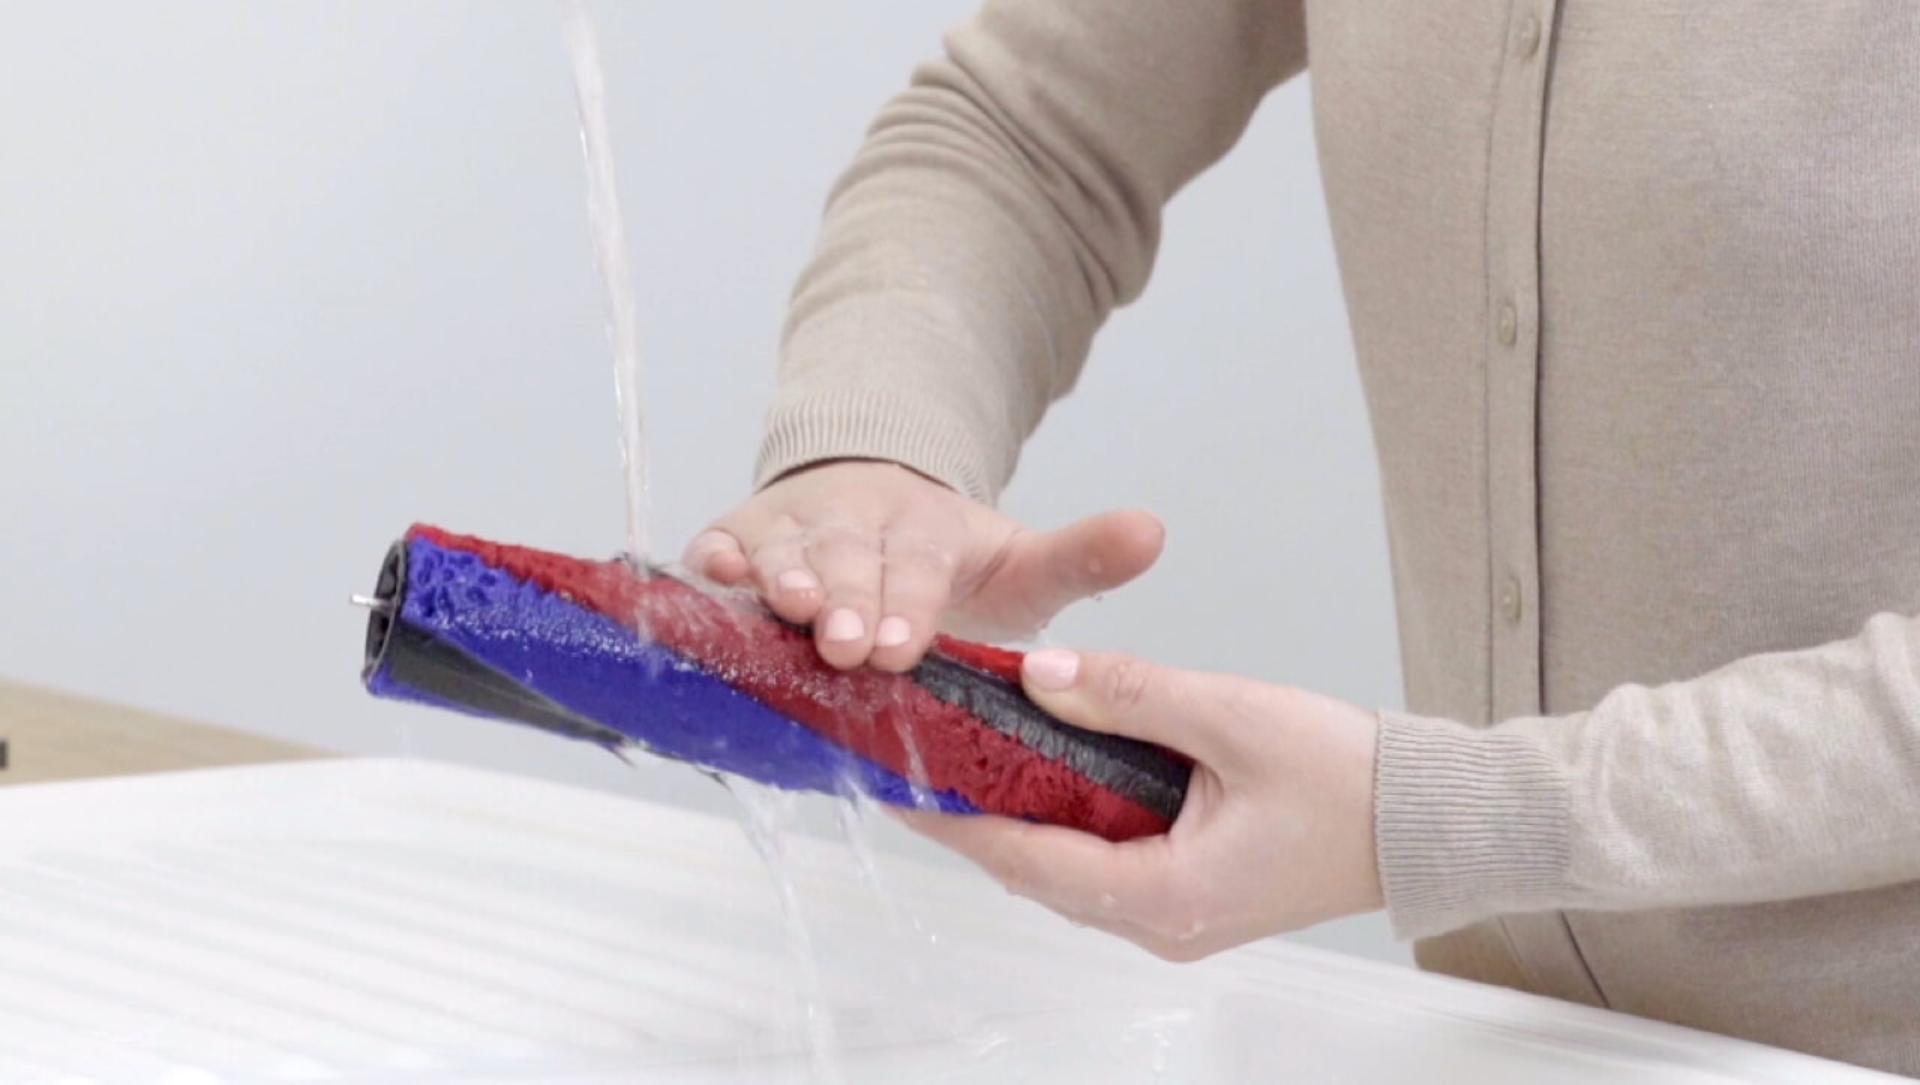
Washing the Micro Fluffy™ cleaner head
Removing fine dust from the Soft roller brush bar maintains its effectiveness. Detach from the cleaner head, and wash in cold tap water until the water runs clear. Make sure it's completely dry before refitting. Our video guide shows you how.
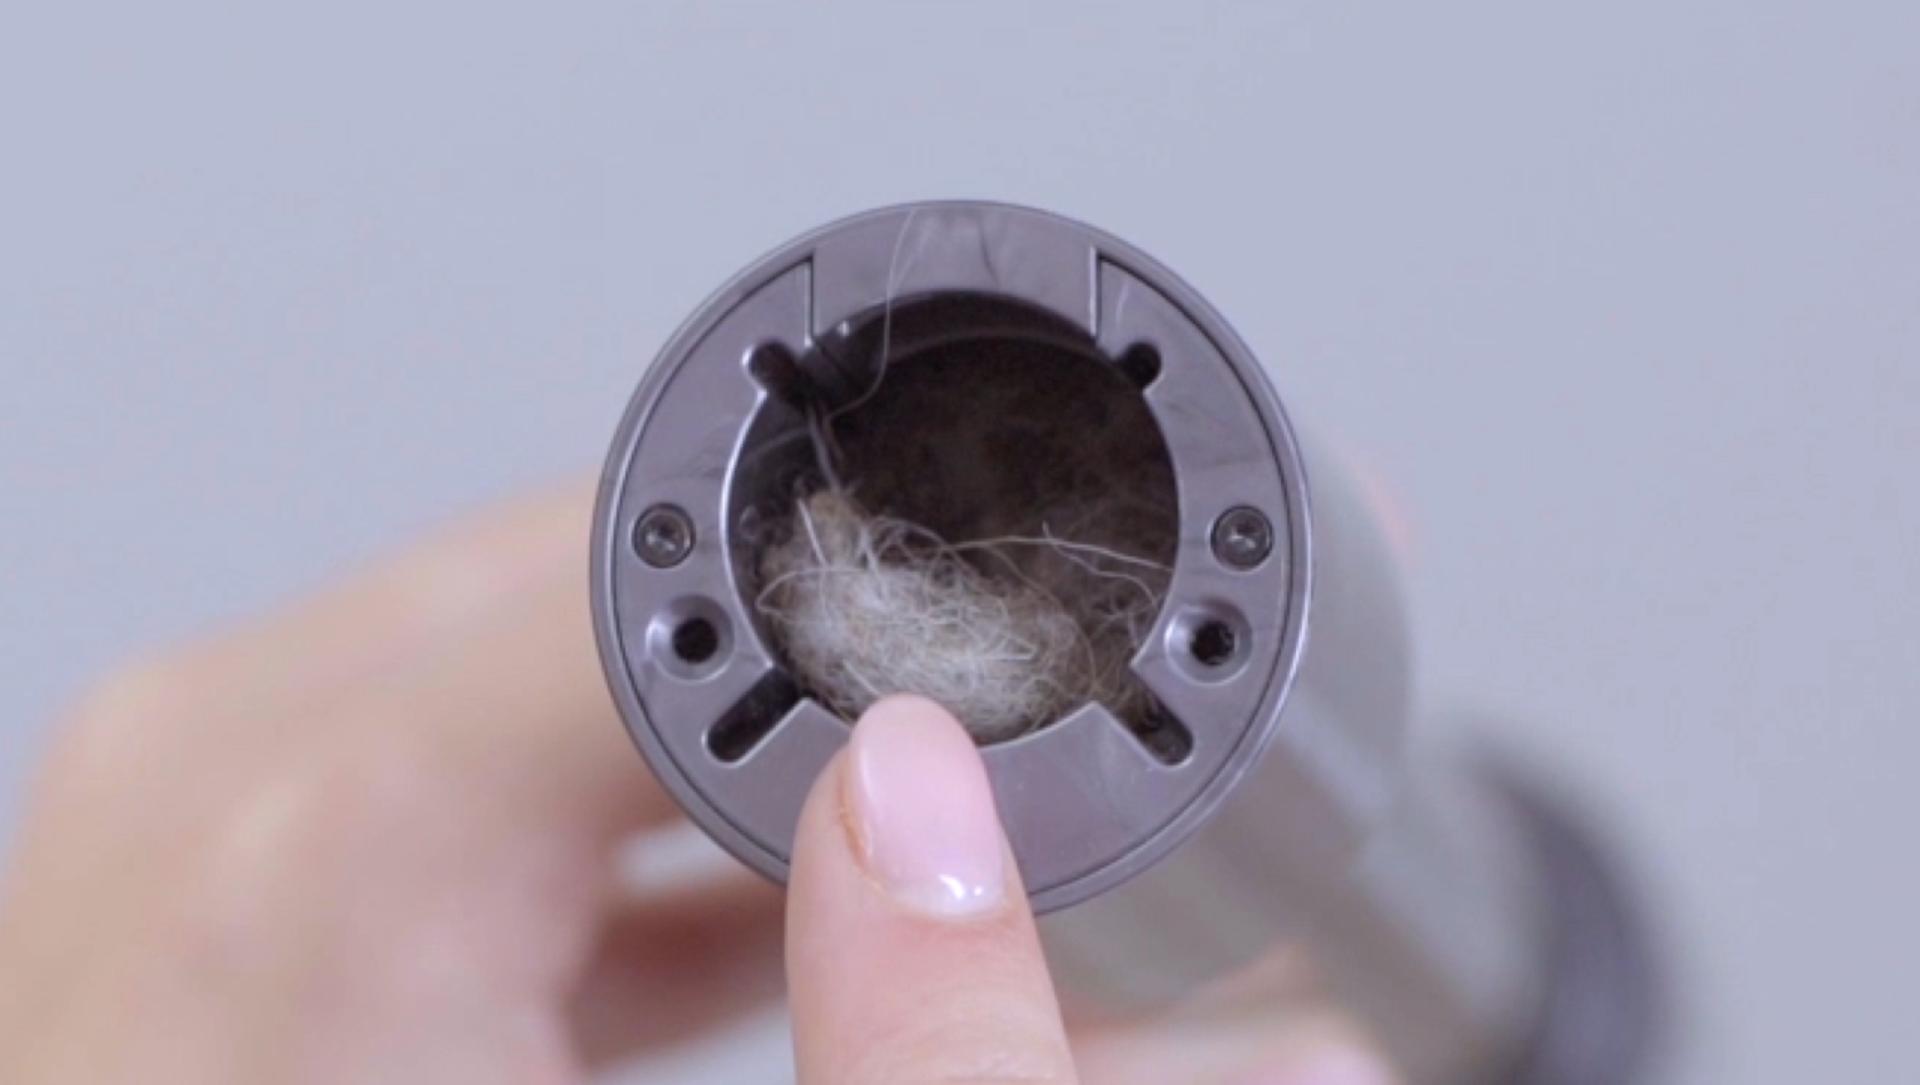
Checking for blockages
If your machine detects a blockage, the motor will pulse six times. You won’t be able to use your machine until the blockage is cleared. If this happens, remove the wand, bin and cleaner head and clear any blockages you find. Watch the video guide to see how.
-
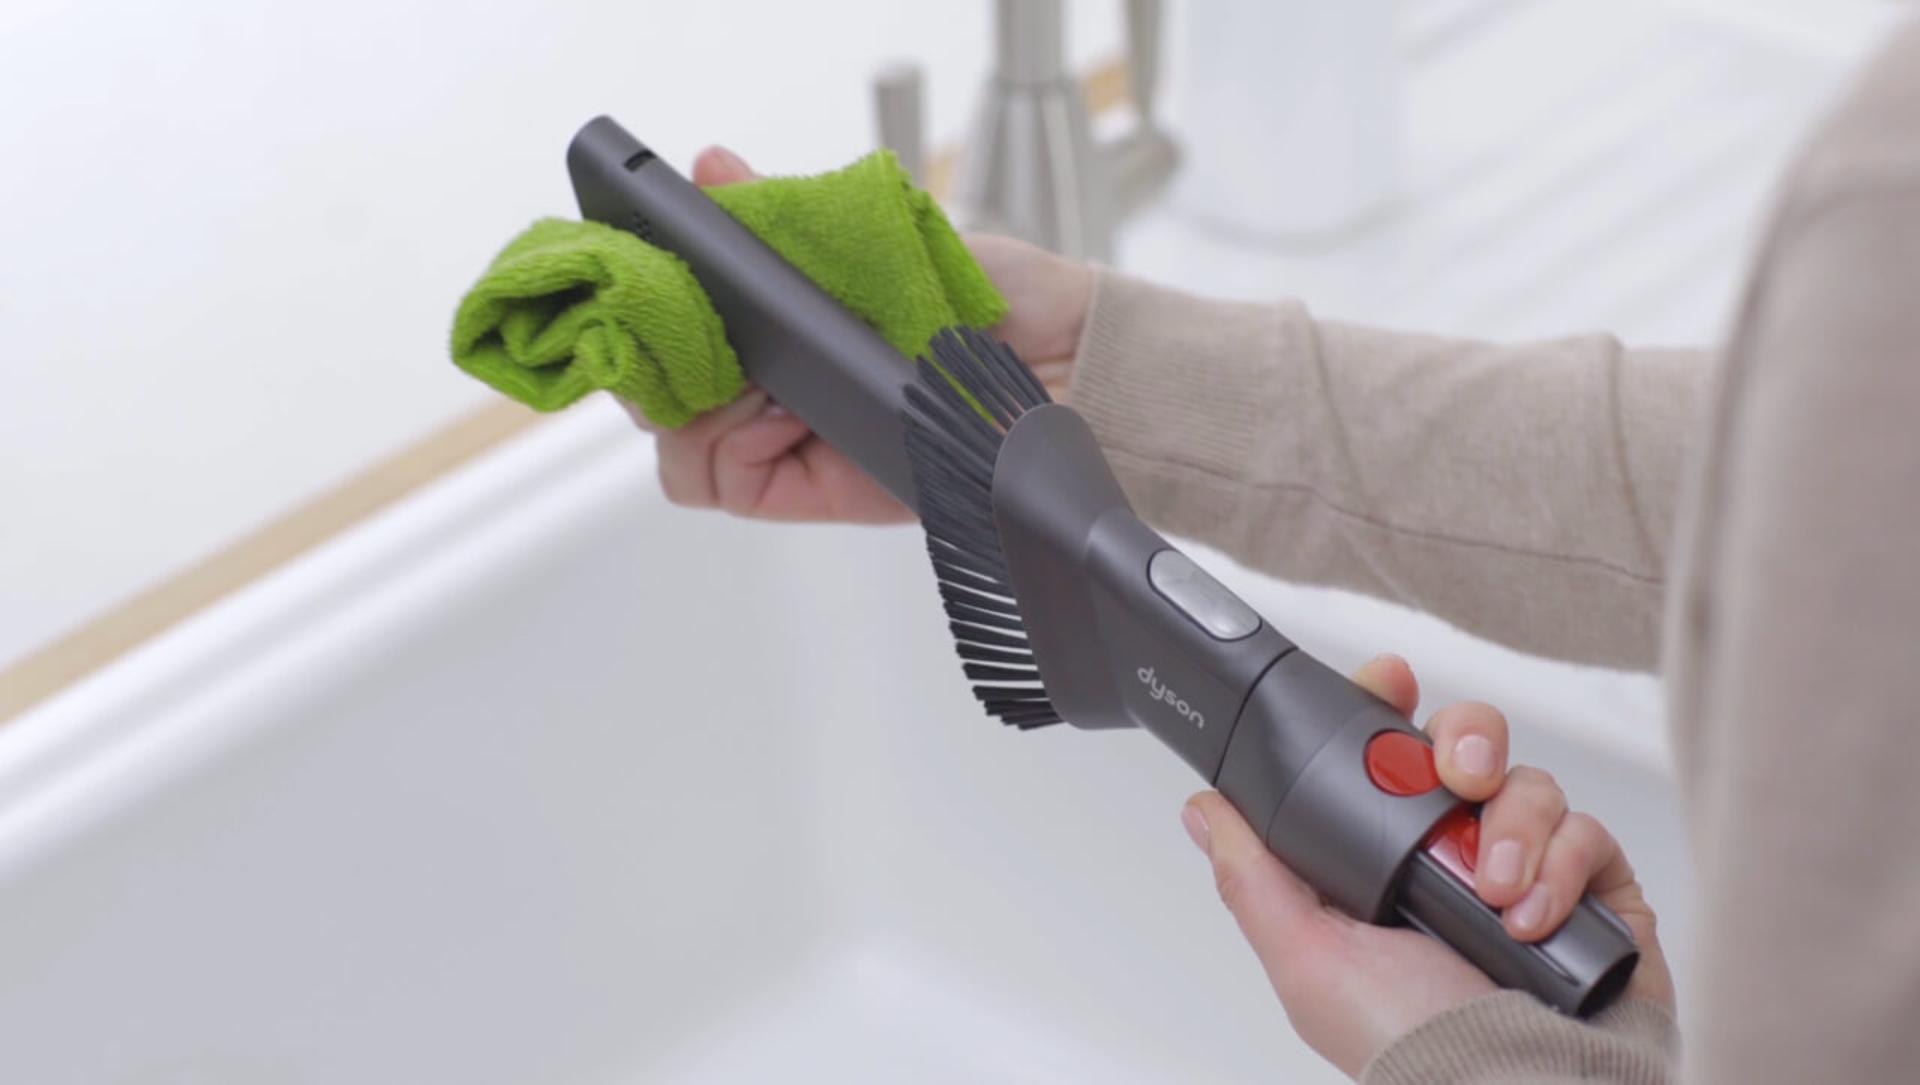
Cleaning the washable parts
Many parts of your machine can be easily cleaned using a lint-free cloth. This helps to maintan performance by preventing a build up of fine dust. Our video guide shows you how.
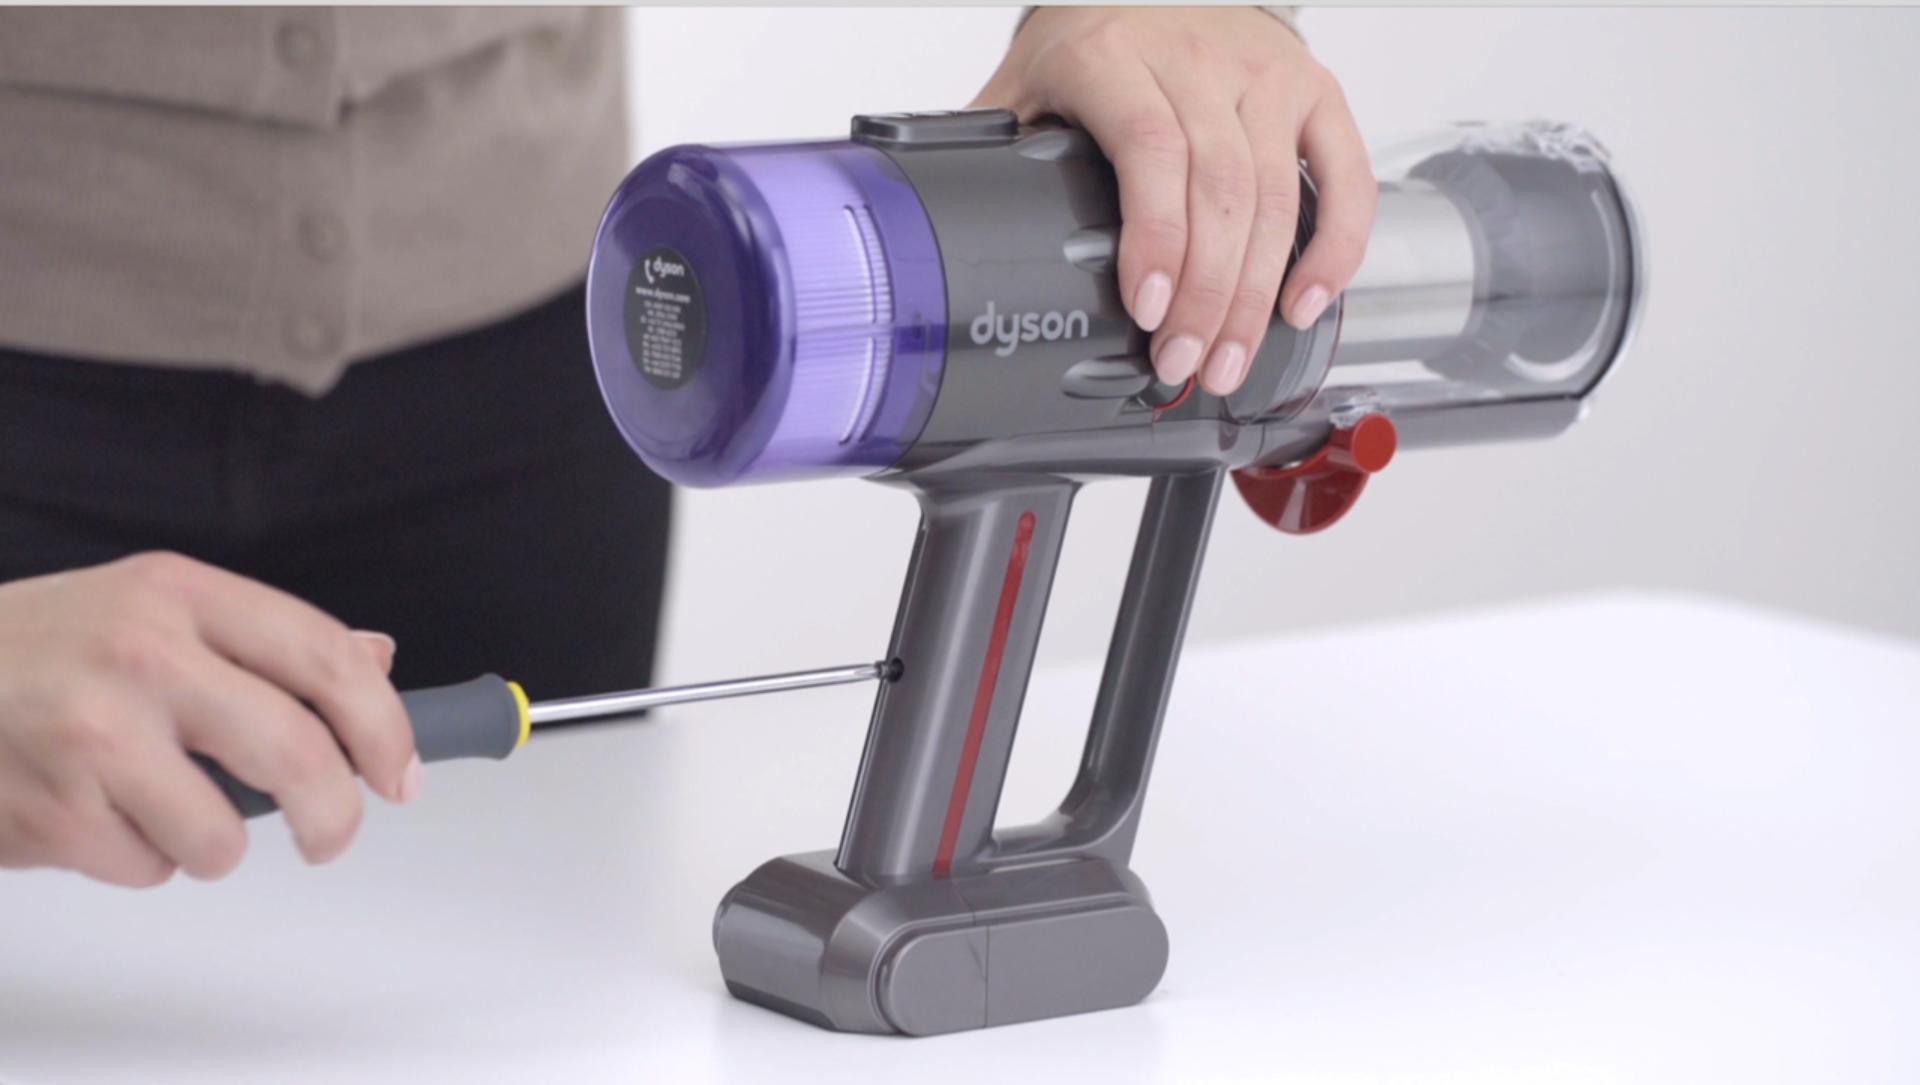
Replacing the battery
With your machine unplugged from the charger, the battery can be replaced using a small Posidrive screwdriver. Watch our video to guide you through the steps.
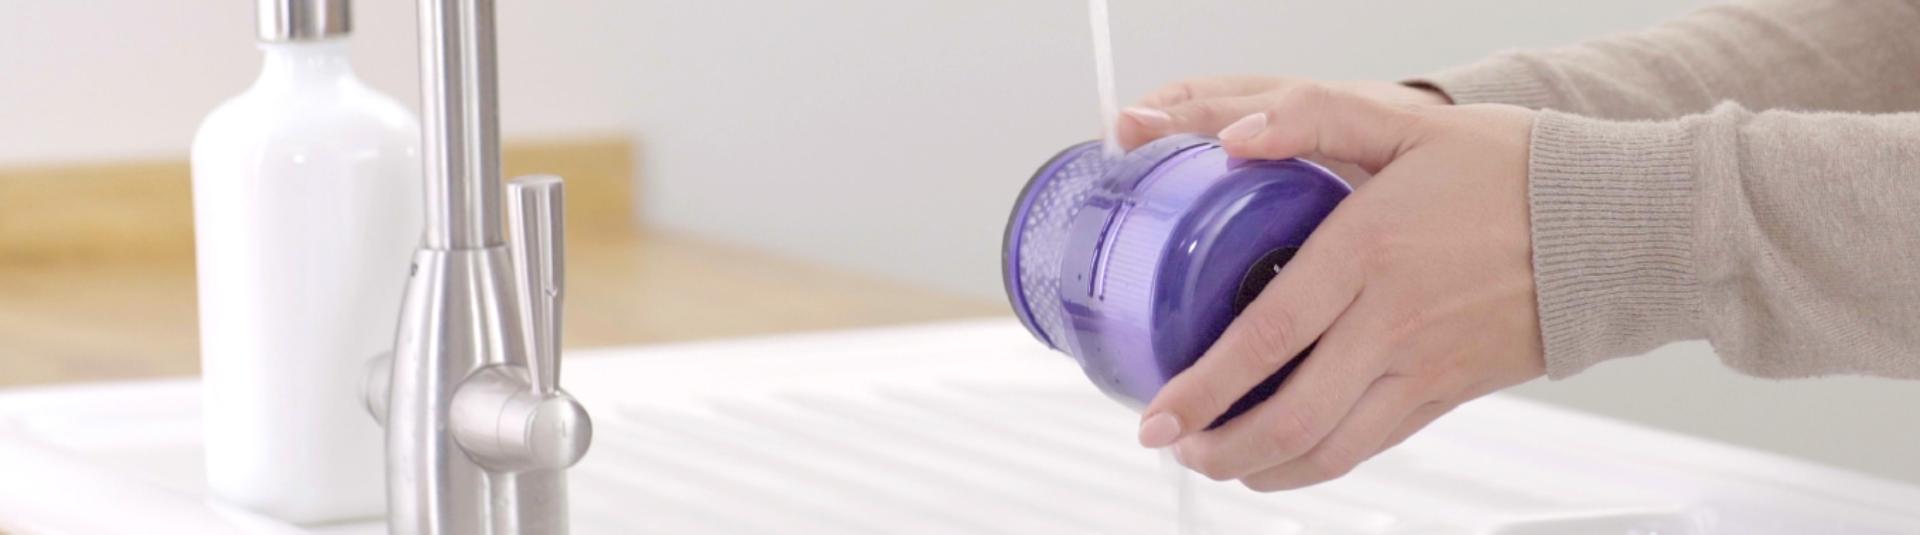
Cleaning your filter
Your filter captures fine dust which can build up over time and reduce performance. But by cleaning it at least once a month, you can help maintain suction power. Follow the video guide, or step-by-step instructions below.
-
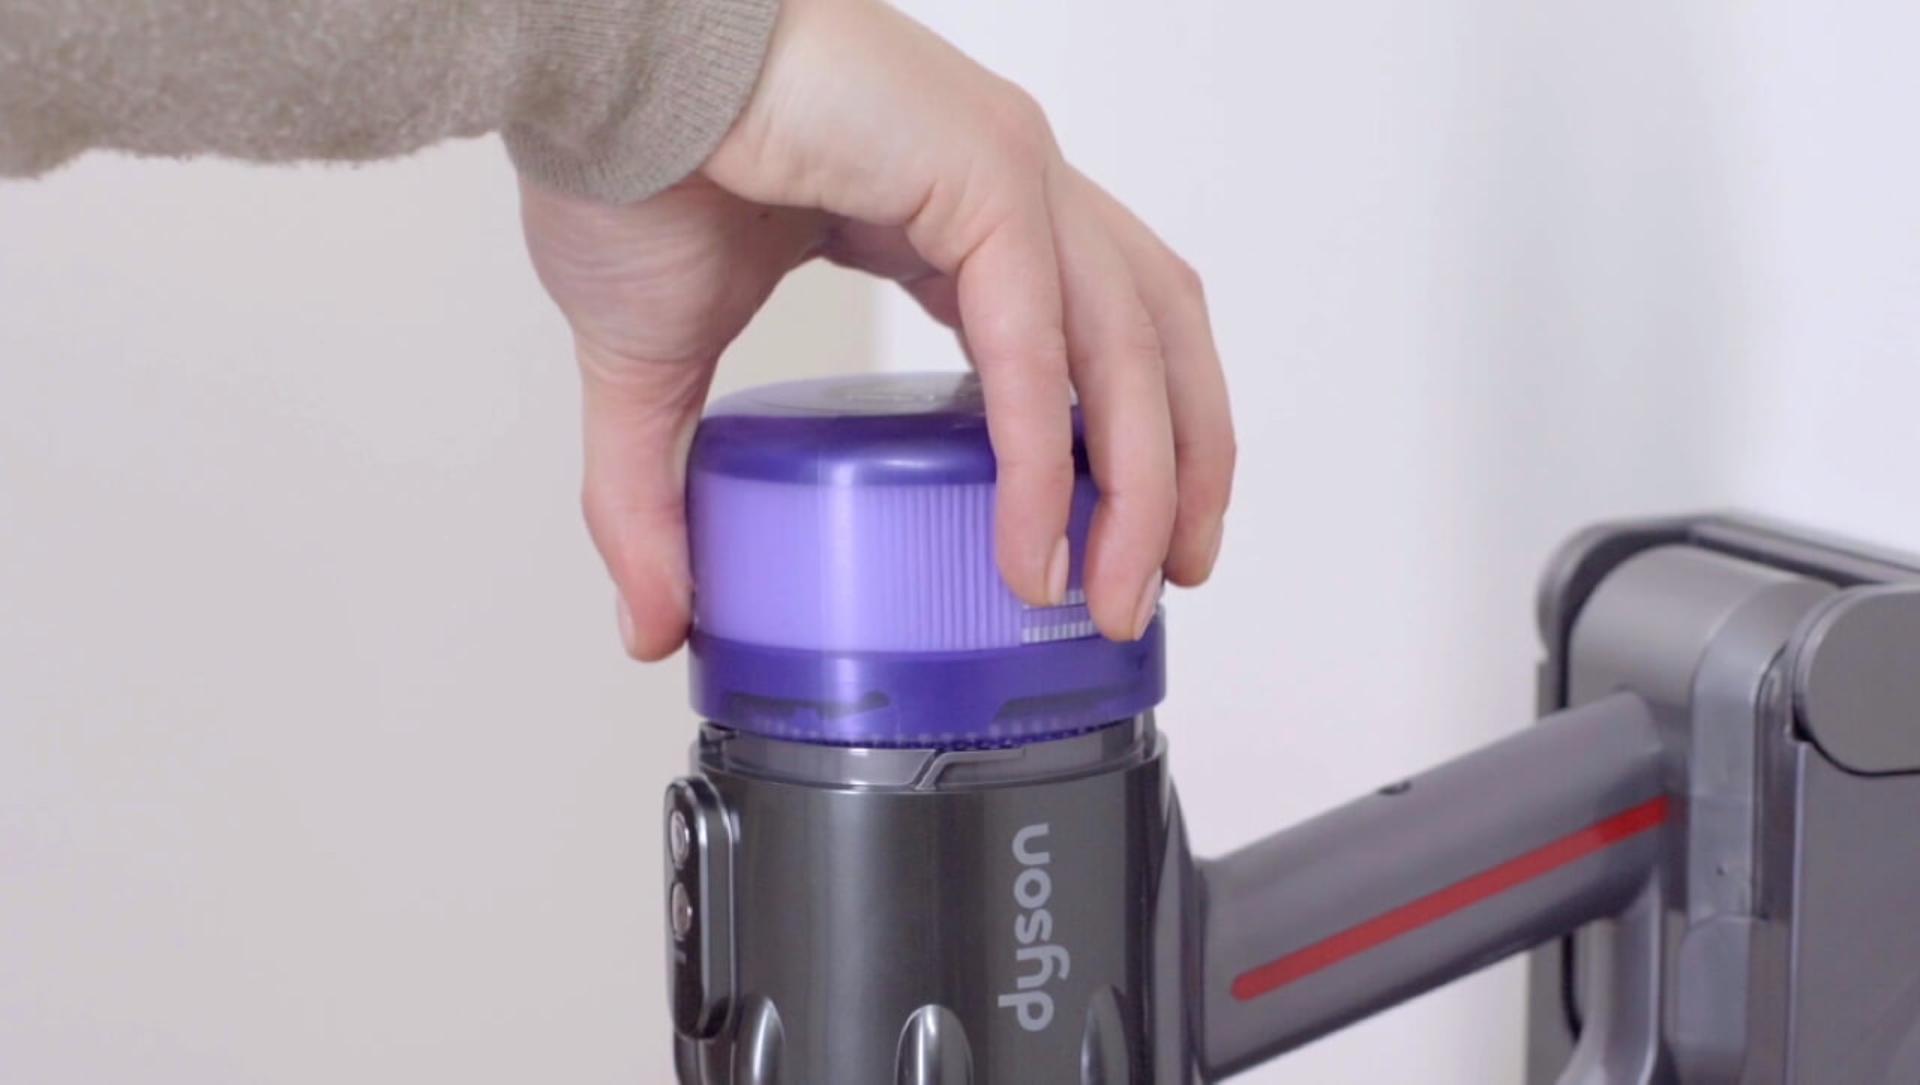
1. Turn off your machine
Disconnect your machine at the wall socket and twist the top to remove your Dyson filter.
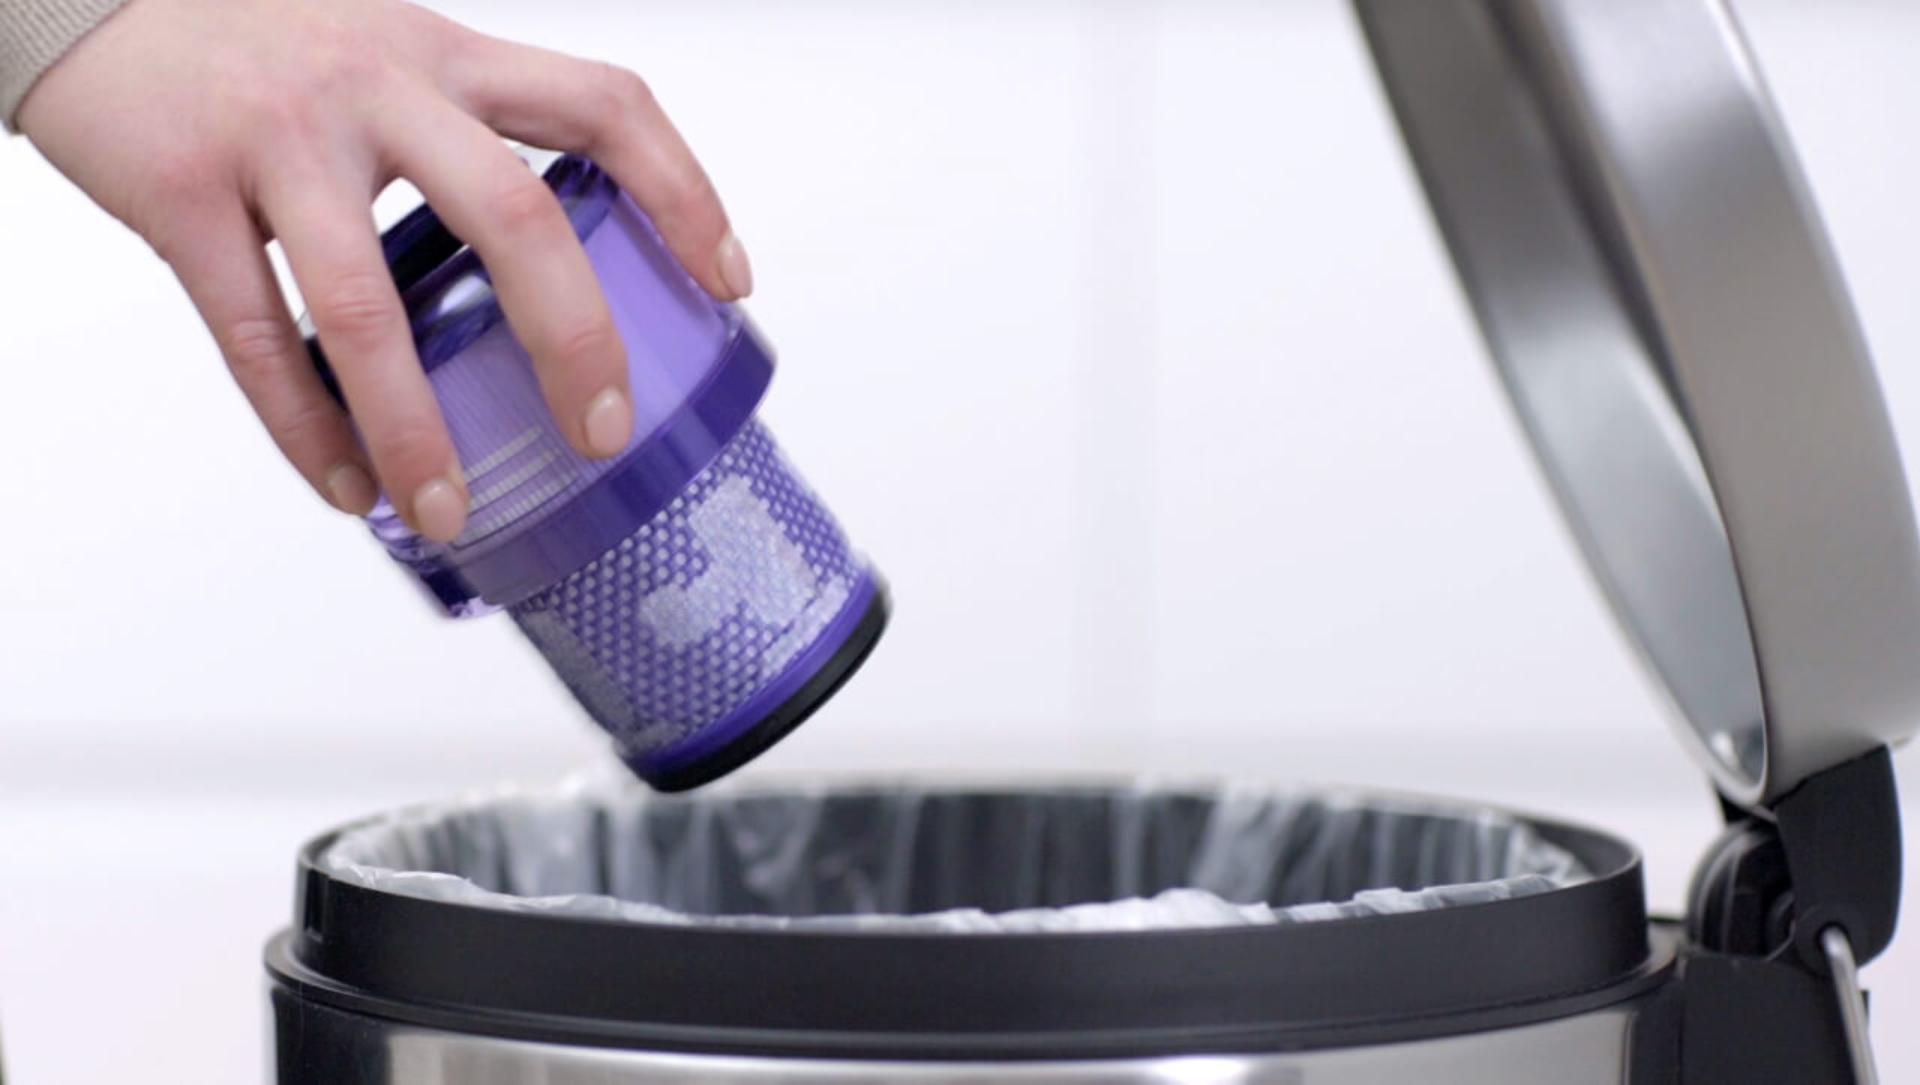
2. Remove excess debris
Tap your filter unit lightly on the side of the sink or in the bin, to remove any loose dust and debris.
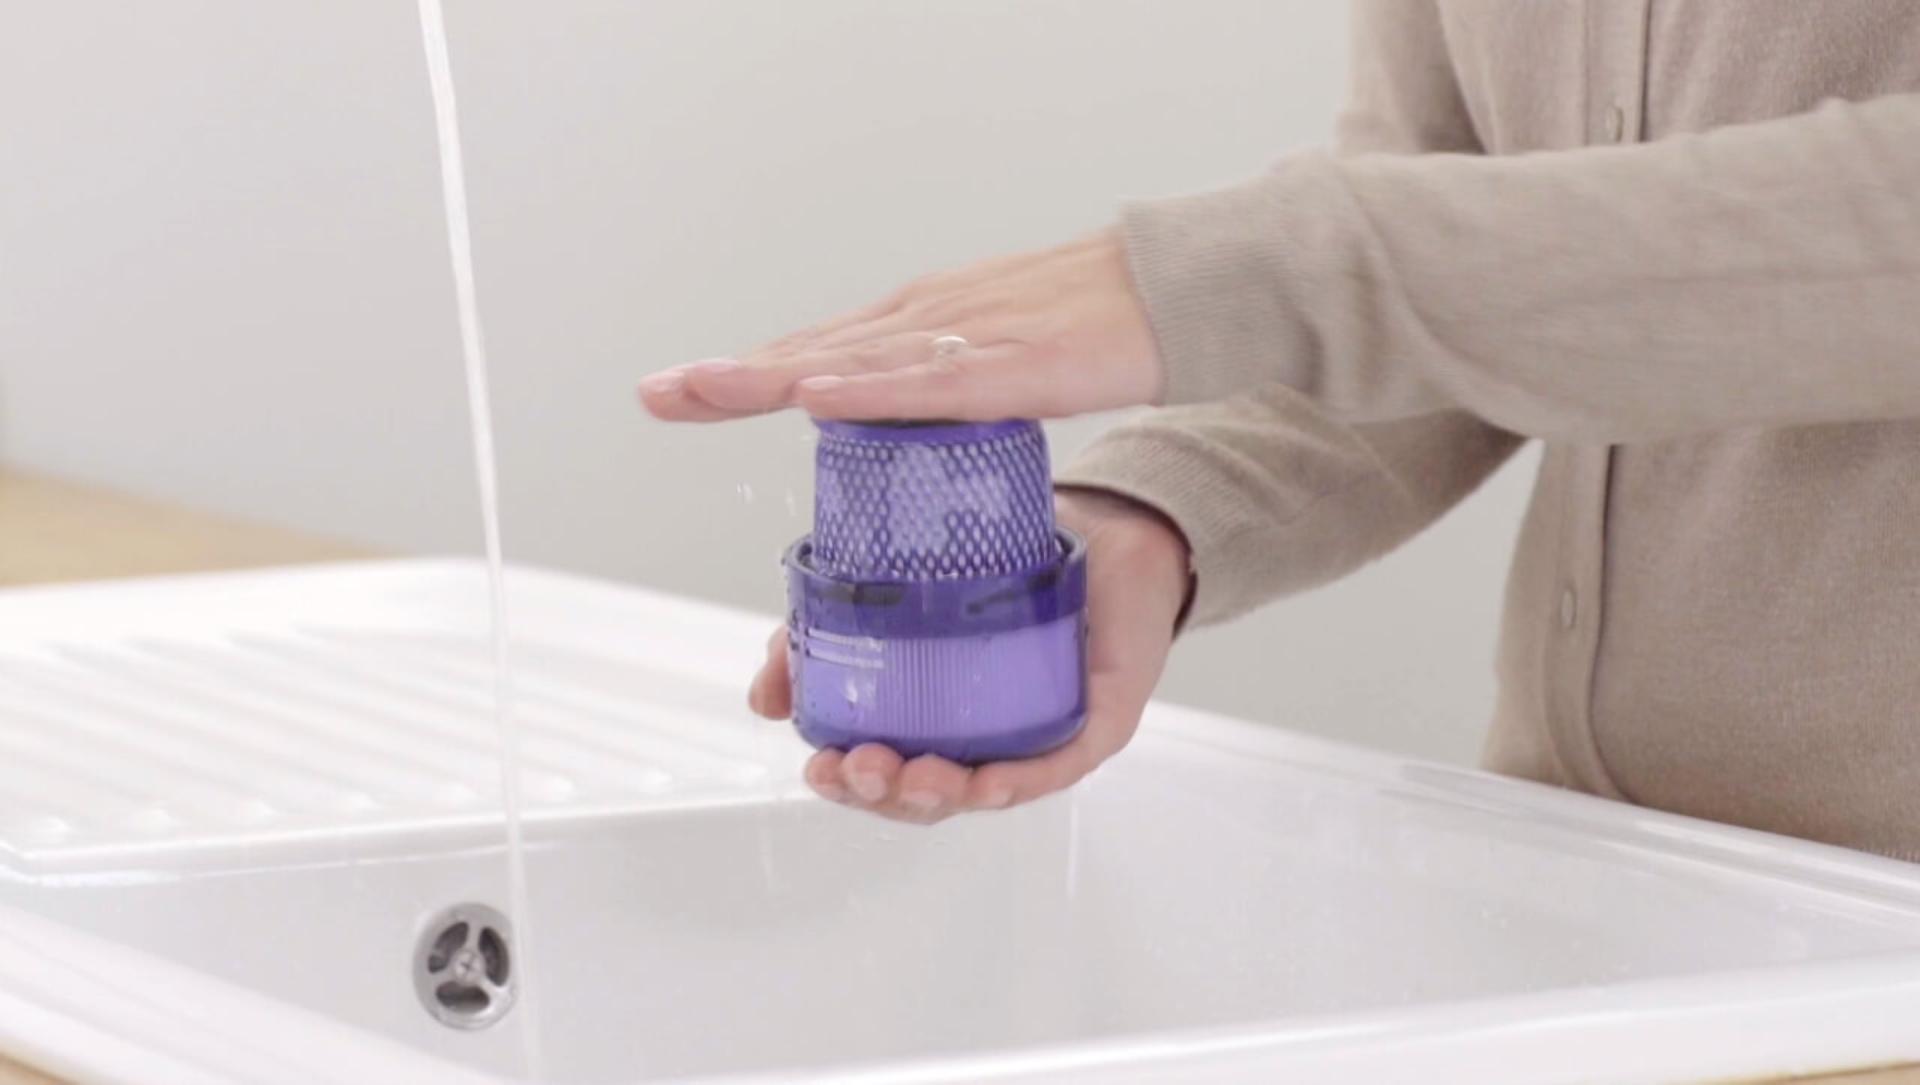
3. Rinse filter
Wash your filter unit under the tap, gently squeezing the water out with your hands. Avoid using detergent or washing in a dishwasher or washing machine.
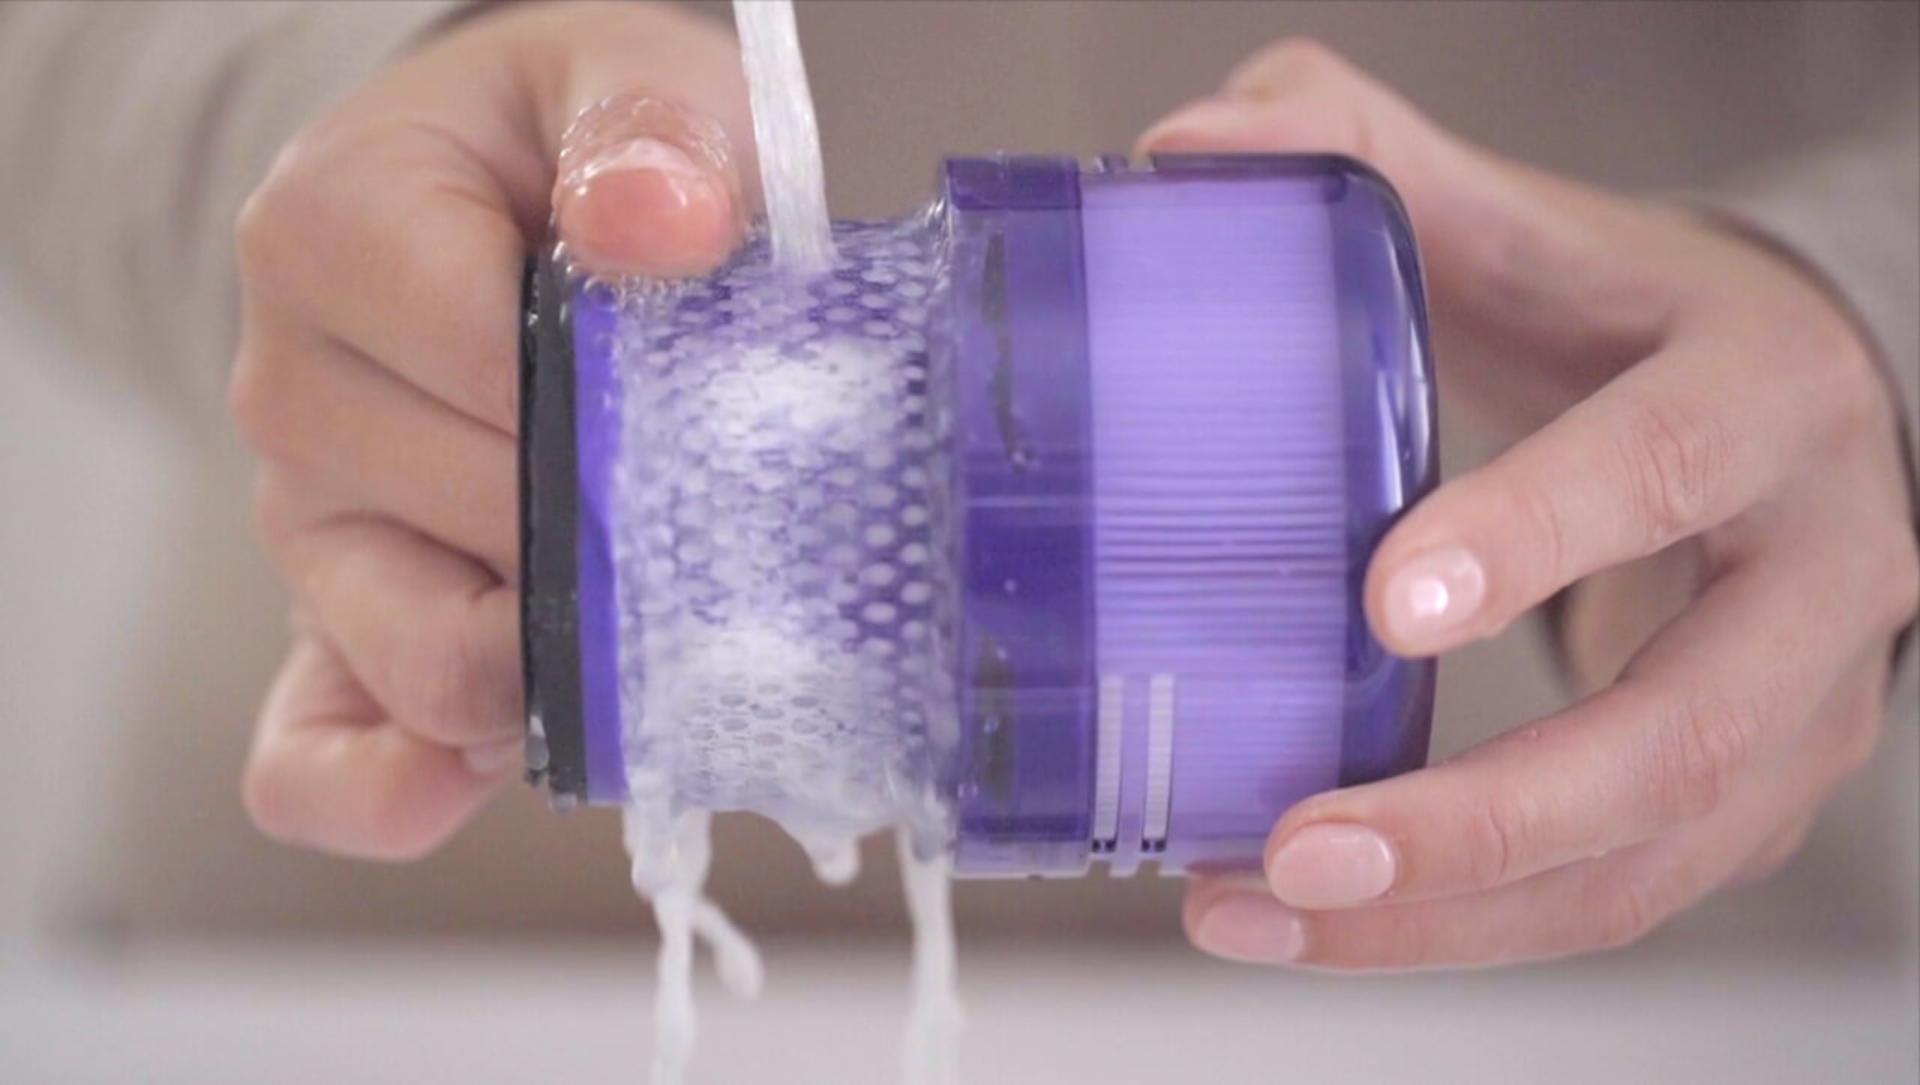
4. Give it a gentle shake
Fill the filter unit with water. With one hand covering each end, shake it gently to ensure all trapped debris is released. Repeat this step until the water runs clear.
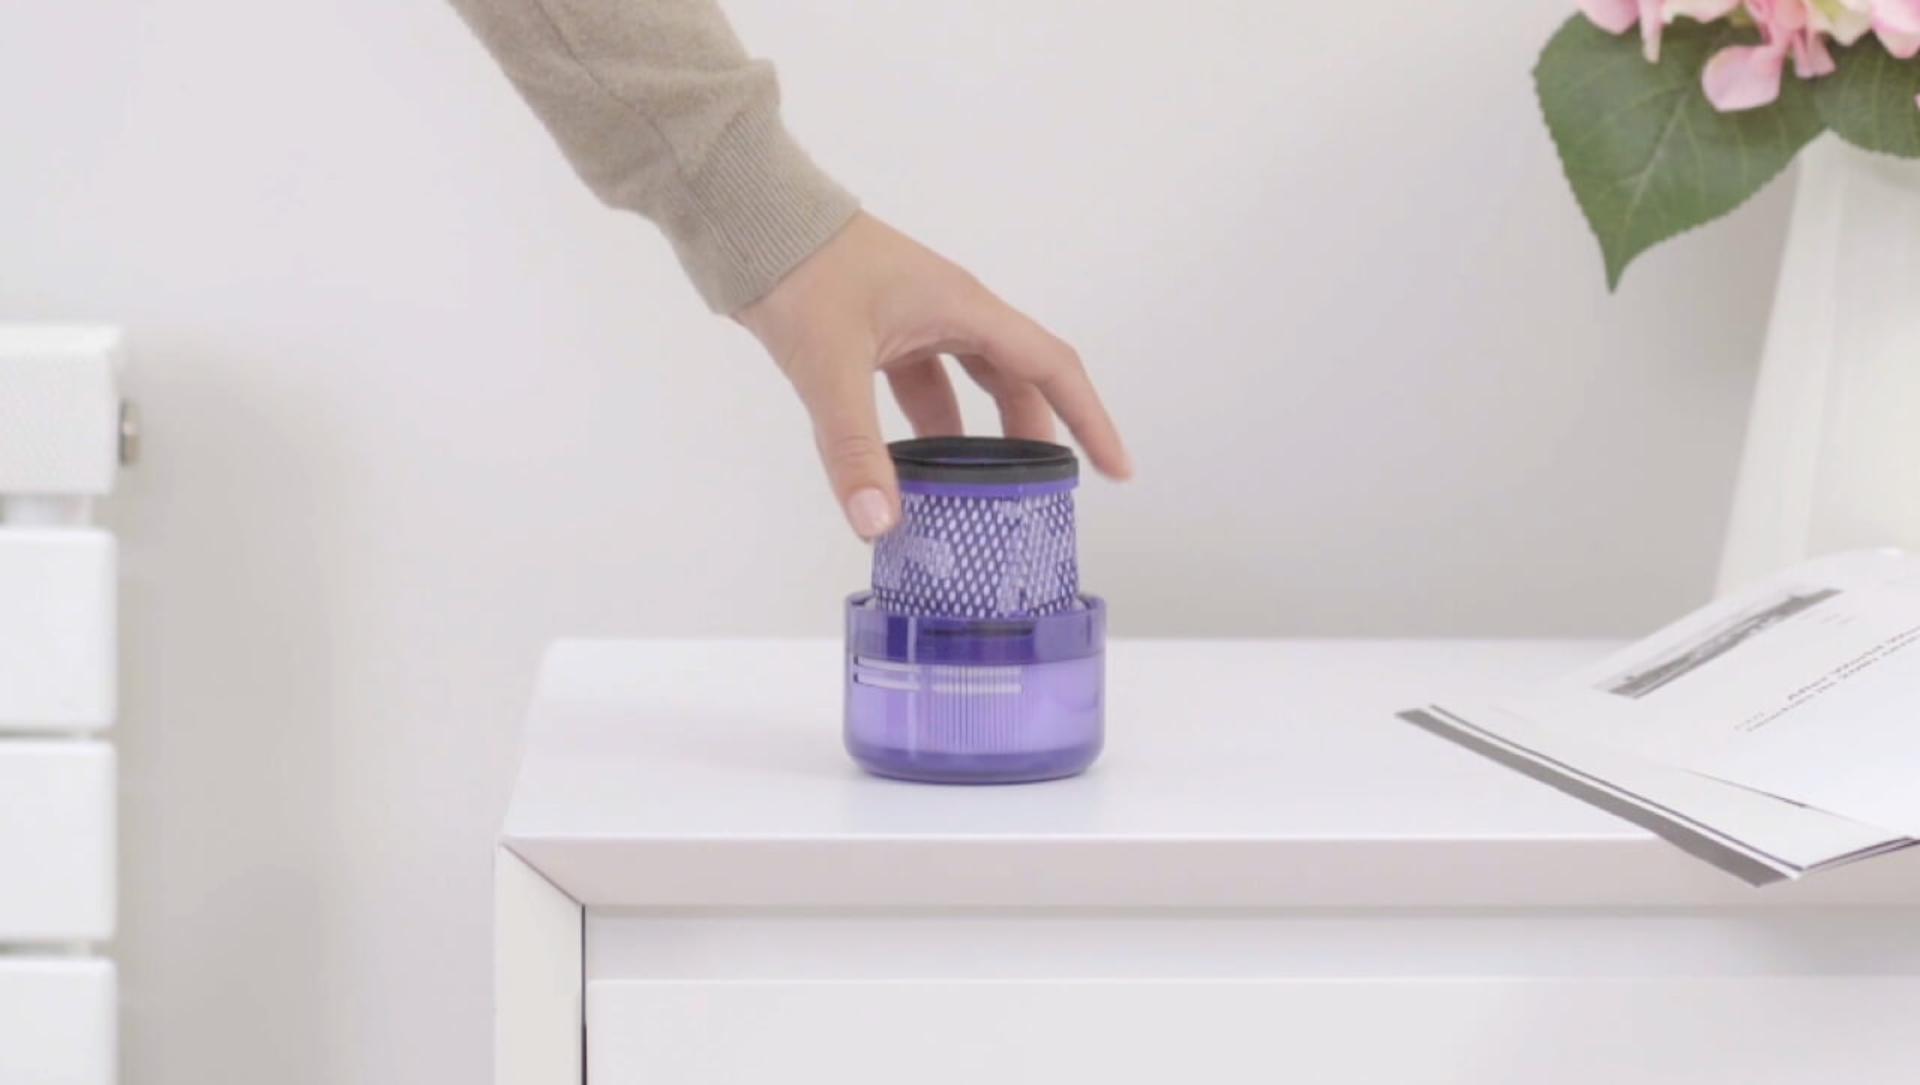
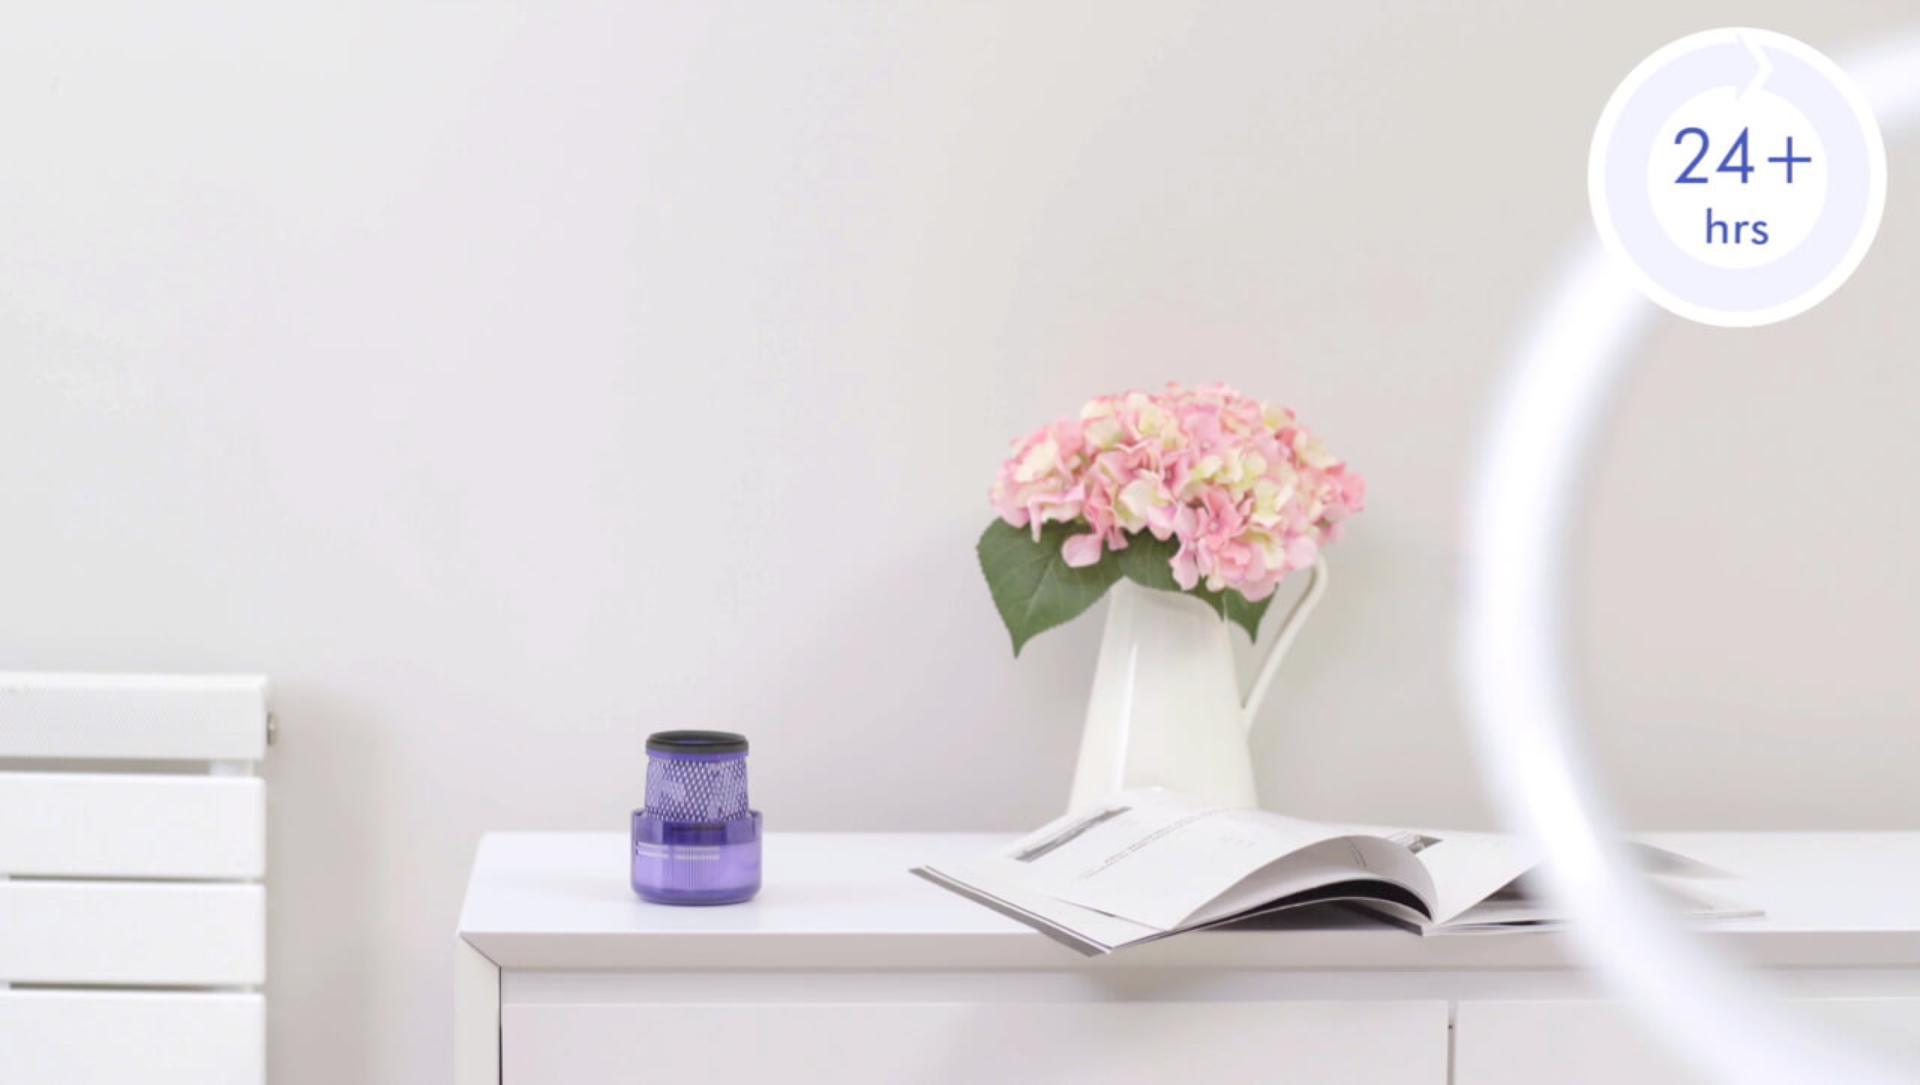
5. Leave to dry for 24+ hours
After washing the filter, leave to dry for at least 24 hours with the wider end positioned downwards.
6. Maximise airflow
Leave your filter in a warm place with plenty of airflow until completely dry. This could be beside a fan or open window. Avoid drying the filter in a tumble dryer, microwave or near a naked flame.
Frequently asked questions
We recommend you clean your filter around once a month, but this may be more frequent if you use your machine heavily. After cleaning your filter, always leave it to dry for at least 24 hours. Ensure it's completely dry before refitting on your machine. We strongly recommend following the cleaning instructions and cleaning by hand. The filter is not suitable for dishwasher use.
A full charge takes up to 3.5 hours.
Your battery has been designed to be left on charge, so it’s fine to leave it plugged in after charging.
Care, from the people who made it
-

Expert guides
From quick-start guides to expert how-tos. All tailored to you and your machines.

Helpful tips
Tailored reminders that will keep your machine working at its best, for longer.

Priority owner access
Receive invites to exclusive events and be among the first to hear about the latest Dyson technology.

Tailored 24/7 support
Maintenance advice and troubleshooting, when you need it. You can also activate tailored machine support, direct to your inbox.

Quick and easy troubleshooting
With a step-by-step tool to solve your machine's problem.

Fast repairs and replacements
Get parts, repairs or a replacement if something goes wrong during your guarantee period.
We don't stop caring about our machines once they're yours. Activating your guarantee allows us to give you a tailored, complimentary, direct service for your machine. Even after your guarantee has ended, we'll still be on hand to help.
 Talking to us is easy.
 Call us
+632 7917 4777 Email us at
dysonservice@wpi.ph


